Deploying - using GitOps
Prerequisites
You must have a Stacktape account. If you don't have an account, please sign up
You must have an AWS account connected to your Stacktape organization. Connecting your account takes ~2 minutes. You can connect the account on AWS accounts page in the console
Stacktape config - your repository must contain
stacktape.yml
orstacktape.ts
config. To create it, you have multiple options:(Recommended) Use the interactive config editor. To learn about how to use it, head over to using the config editor.
Use a starter projects with a pre-configured Stacktape configuration.
Follow one of the step-by-step tutorials. Currenctly available tutorials are Fullstack Next.js T3 app and Web API.
Write the config manually. To make this process easier, you can install Stacktape VScode extension.
1 - Create new Stacktape project
After signing in to the console, click on Deploy new project
and select Git project using console
.
Fill in the Project name - this will be the name of your project in Stacktape. A project name must use a small alphanumeric dash case.
1.1 - Connect your Git repository
Option A - GitHub
Click the Connect GitHub Account
button to start connecting your GitHub Account/Organization with Stacktape.
Click the Install
button to start Stacktape GitHub app configuration.
Select GitHub organization.
Finish installation by clicking the Install
button.
Option B - GitLab
Click the Connect GitLab Account
button to start connecting your GitLab Account/Project with Stacktape.
Authorize application access to your GitLab account
1.2 - Select repository to deploy
After successfully connecting your git account, go back to project creation in Stacktape console.
Select the repository with the project you wish to deploy.
After you have finished the steps above, continue by clicking the Continue
button.
2 - Setup GitOps
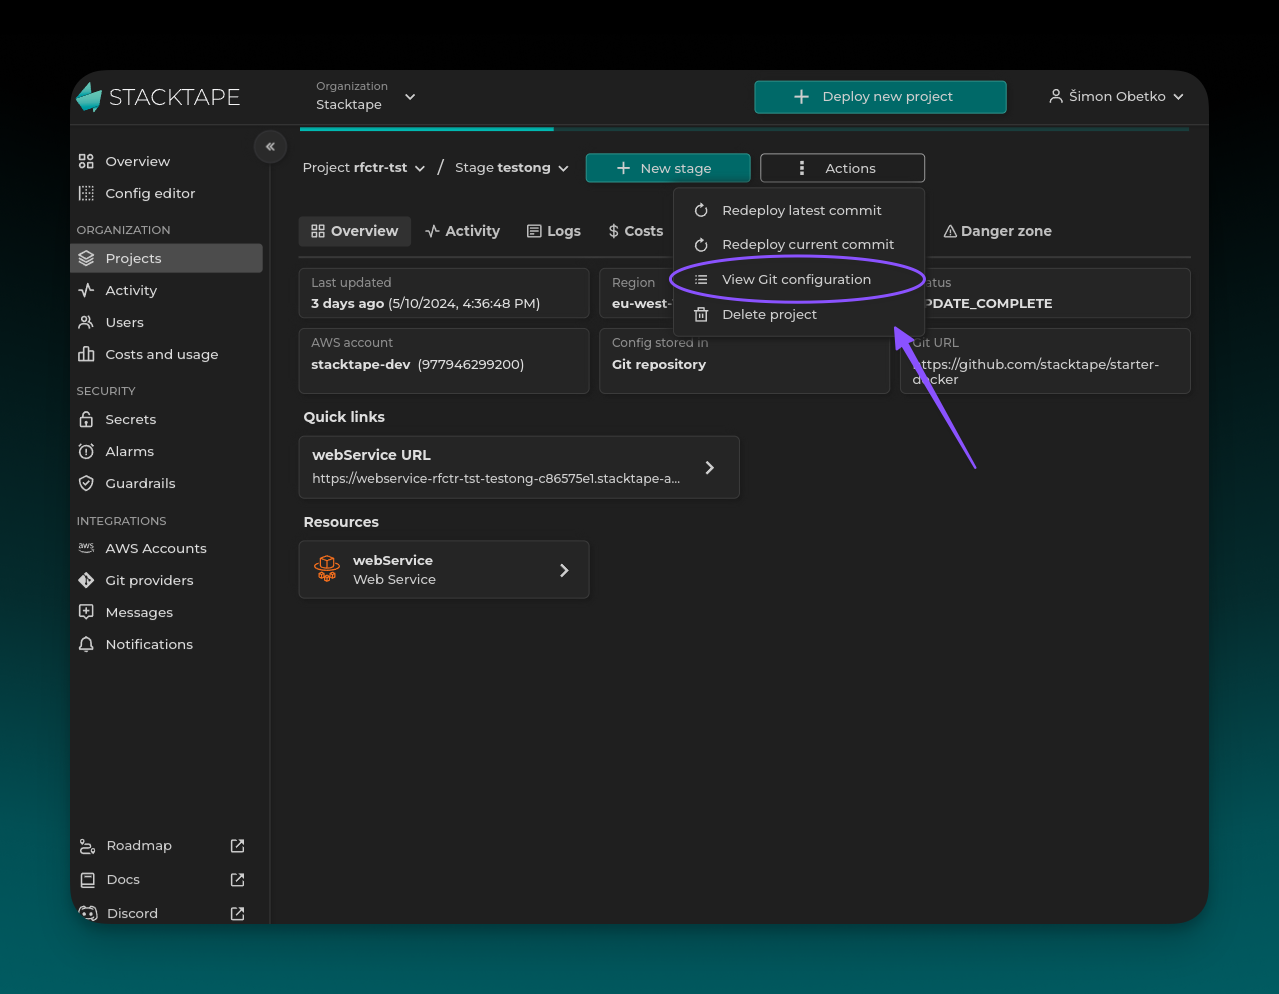
Click on the actions
button, and then select View Git configuration
Stacktape offers two GitOps deployment options. You can use either of them and even combine them.
Push-to-branch deployments
Push-to-branch deployment is exactly what it sounds like. Once you configure it for your repository branch, your environment is deployed to configured project stage when you push into the branch. As you continuously push into the branch, your environment is automatically updated. To configure push-to-branch automatic deployments:
Click on the
Set up Push-To-Branch deployments
In the modal window, configure the desired properties for the stage (environment) you want to be deployed automatically.
At this point, every push to the git branch you've configured will trigger a Stacktape deployment.
Preview PR deployments
When you set up preview deployments for your project, each new pull request triggers the deployment of a new environment (project stage). As you continuously push to the PR branch, your environment is updated.
After the pull request is closed or merged, the preview environment is automatically deleted (you can configure this behavior).
Preview environments are a great option to validate and test changes to your app or infrastructure before merging them.
They are also a great choice if you want to evaluate changes to the frontend of your app. Both your manual testers and your marketing team can see a deployed version that they can then test in action.
Click on the
Set up PR deployments
In the modal window, configure the desired properties for the stage (environment) you want all of your preview stages to have.
At this point, every new pull request to the configured branch, will trigger a Stacktape deployment. Stacktape will also automatically create a comment inside the PR that shows some properties of the deployed stage - including a link (URL) to all of the internet-accessible resources within that stack (if any).