Deploying with the Console
You can deploy your application directly from the Stacktape console by connecting it to your Git repository.
Prerequisites
Before you begin, make sure you have the following:
- A Stacktape account.
- An AWS account connected to your Stacktape organization.
- A Git repository containing your application code and a
stacktape.ymlorstacktape.tsfile.
1. Create a Project
First, create a new Stacktape project. In the console, click Deploy new project and select Git project using console.
Enter a project name
Enter a name for your project.
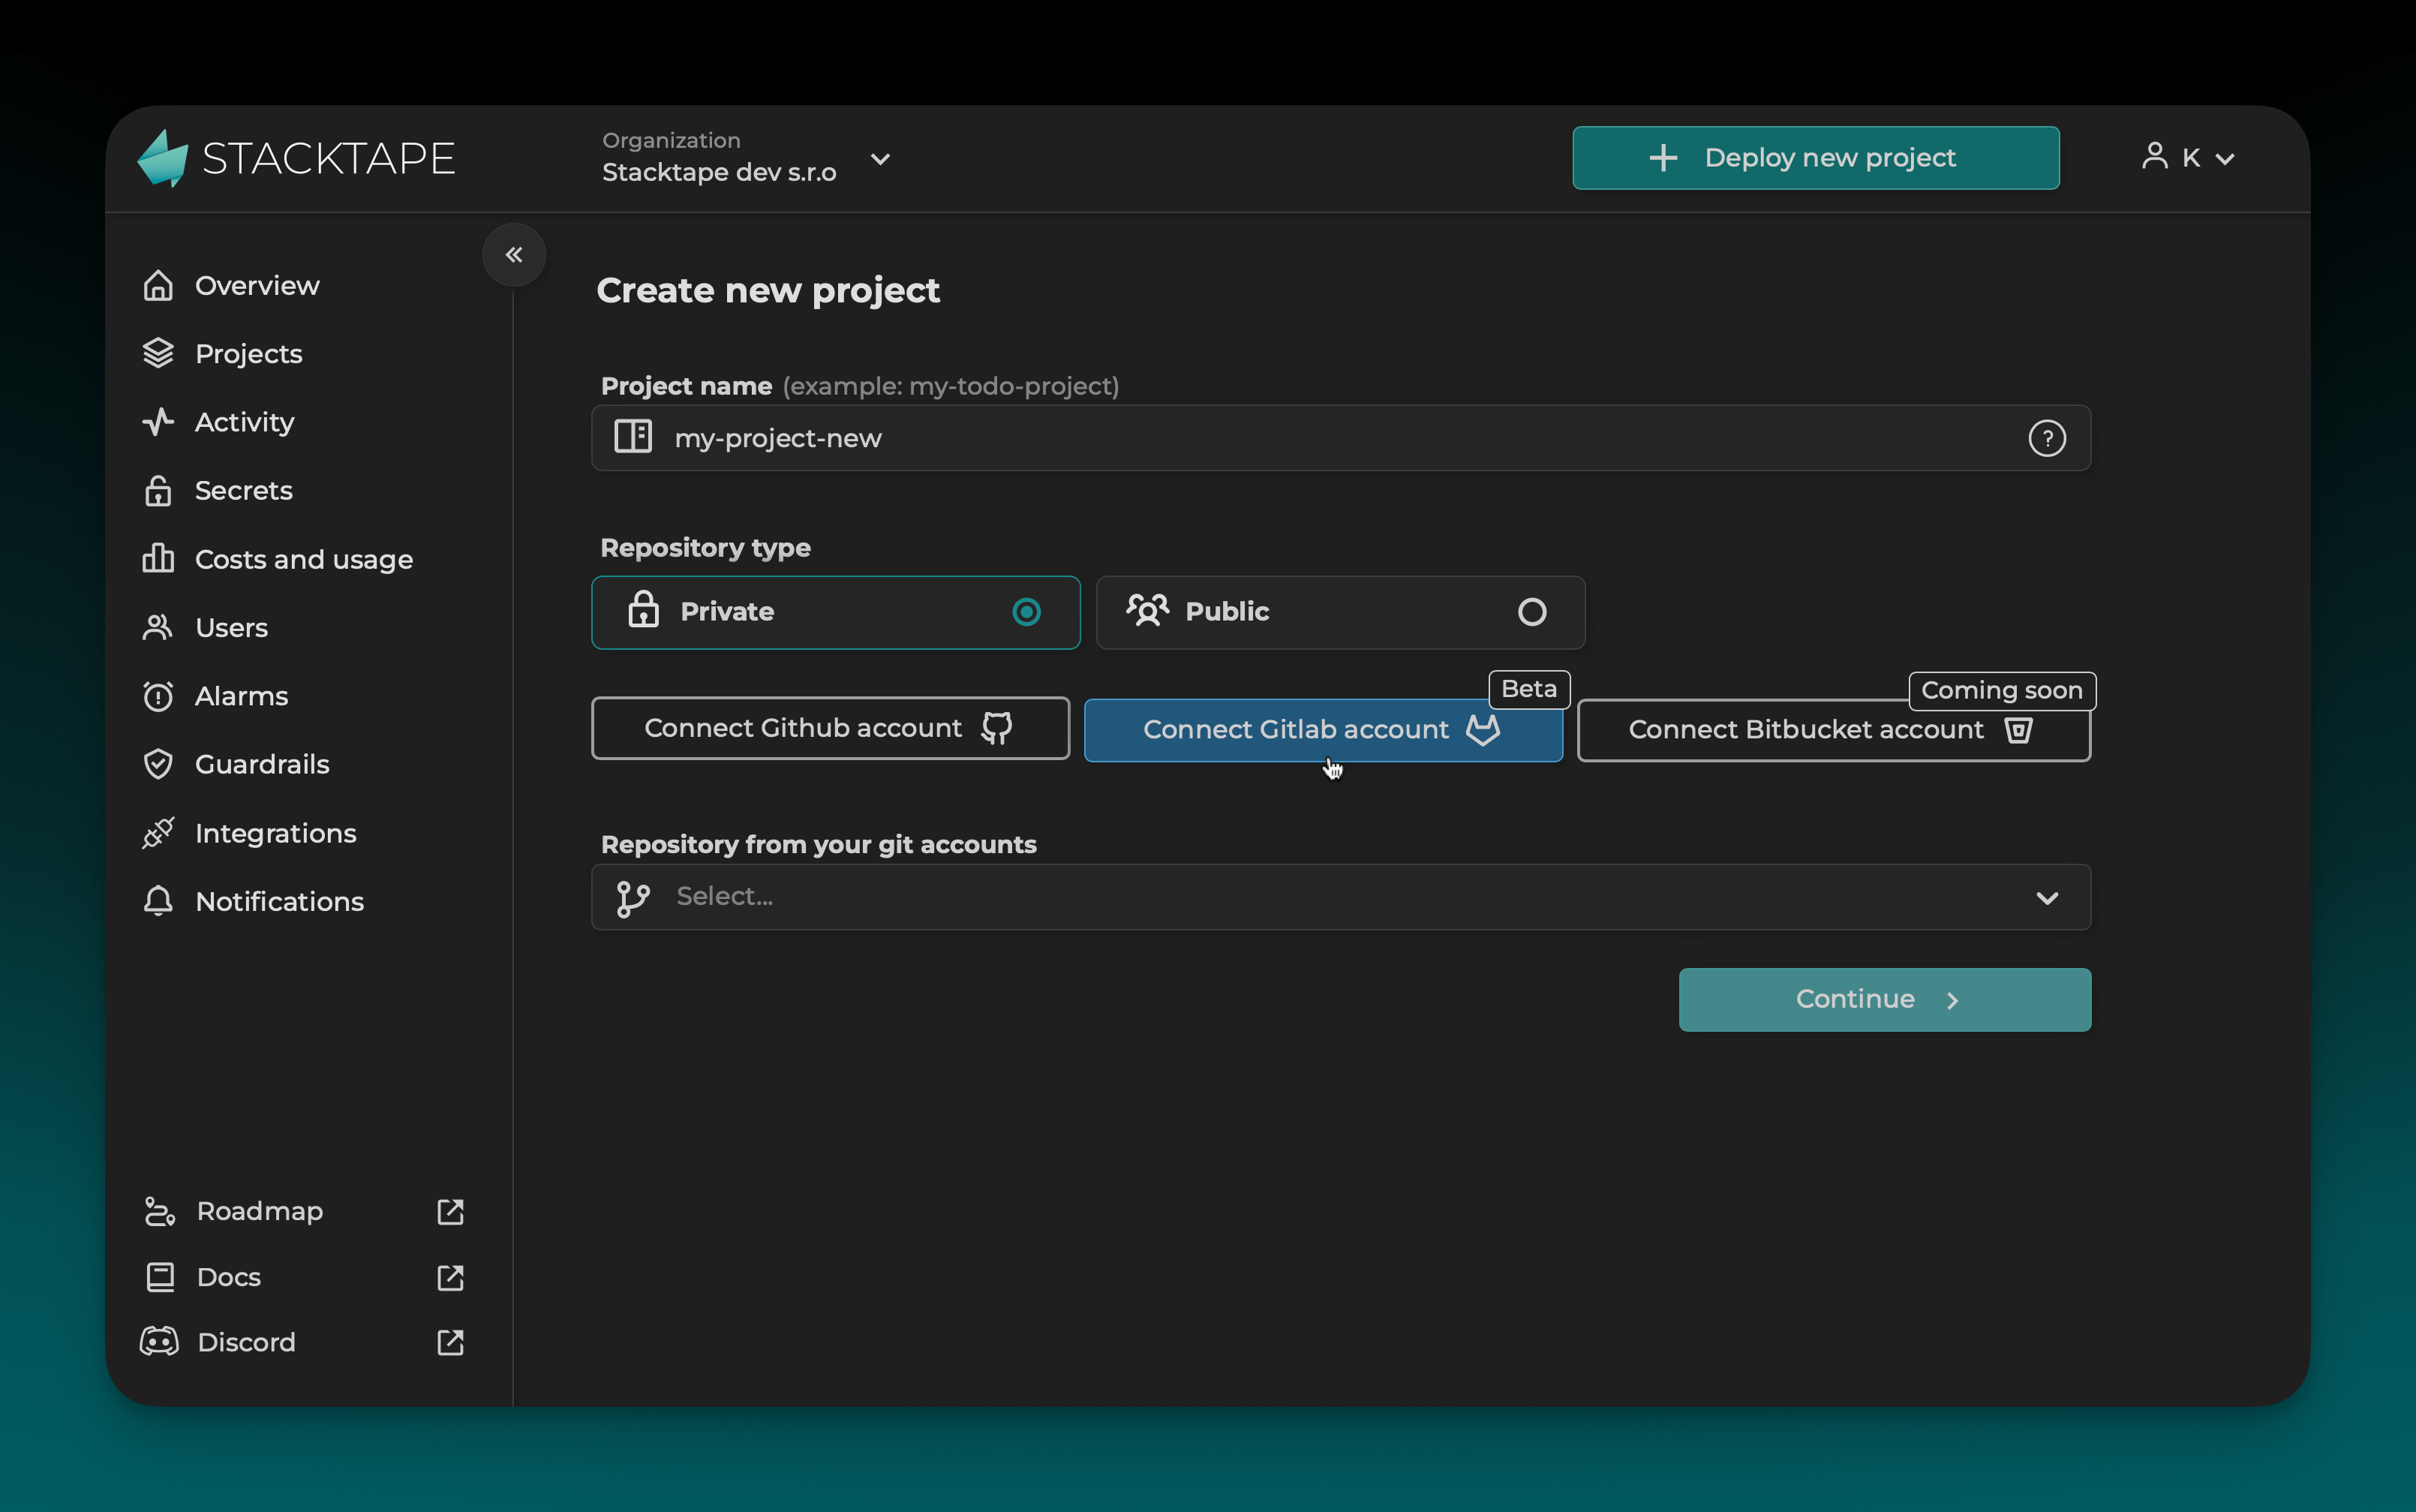
Connect your Git repository
Connect your GitHub or GitLab account to Stacktape.
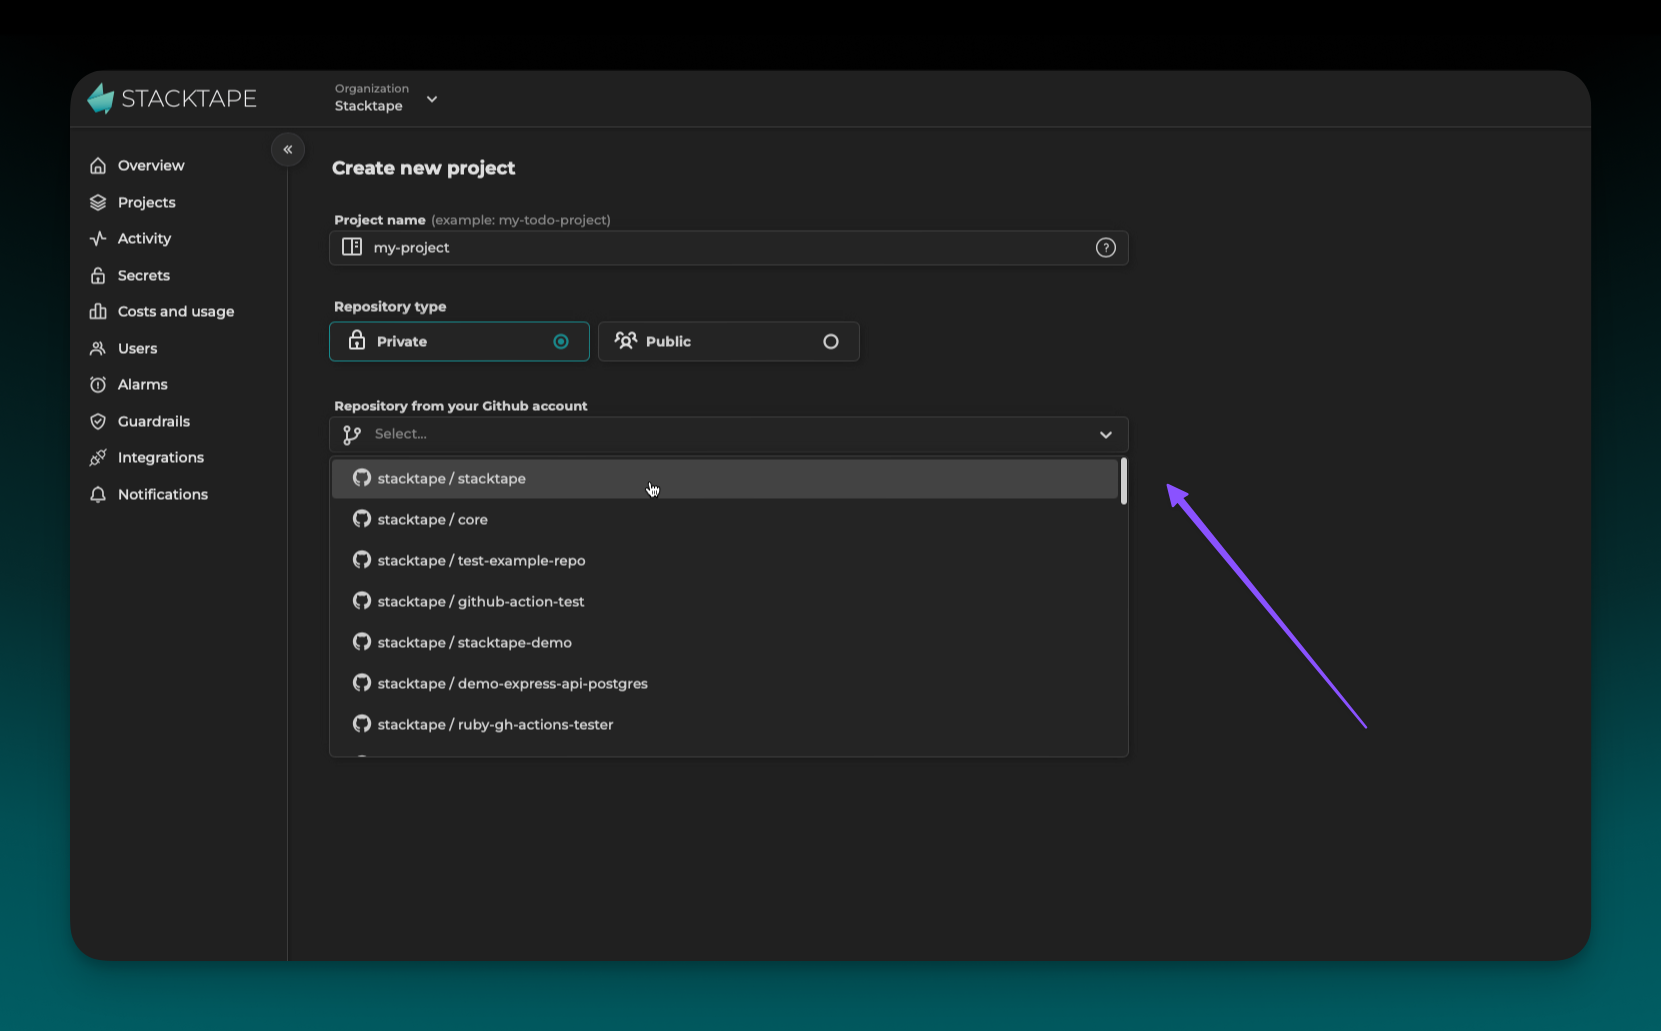
Select a repository
Select the repository you want to deploy.
Finally, click Continue.
2. Deploy a Stage
Once you've created a project, you can deploy a new stage. On the project page, click Create new stage.

Configure stage details
- Branch: The Git branch you want to deploy.
- Commit: The specific commit you want to deploy.
- Stage: A name for your new stage (e.g.,
production,staging). - AWS Account: The AWS account you want to deploy to.
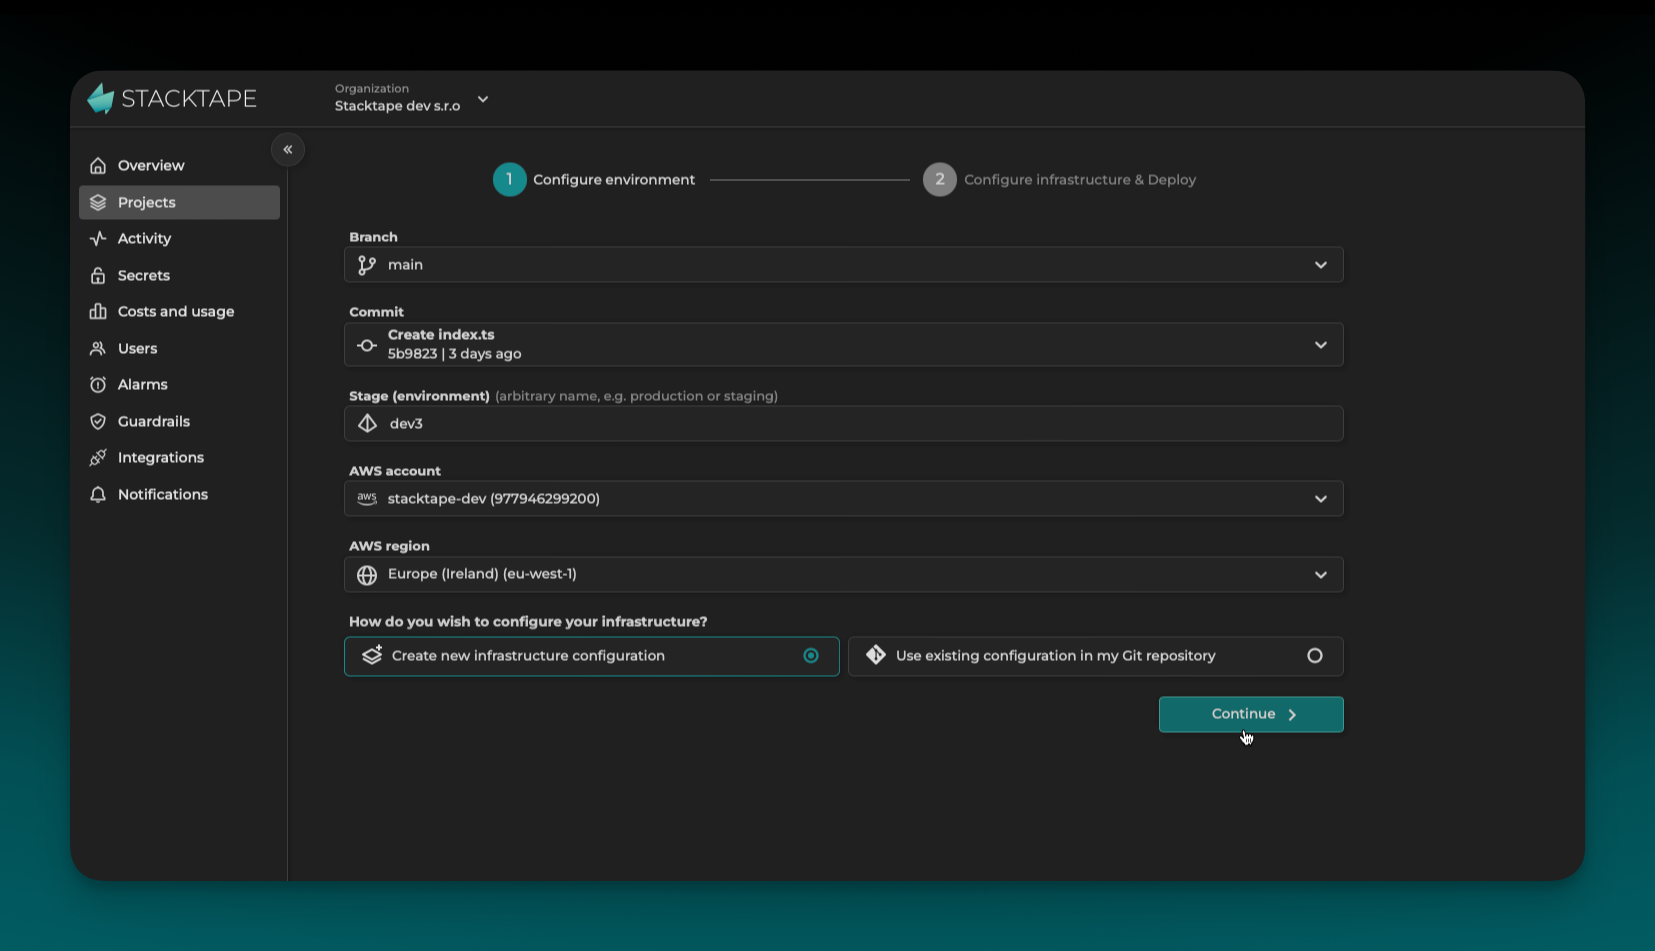
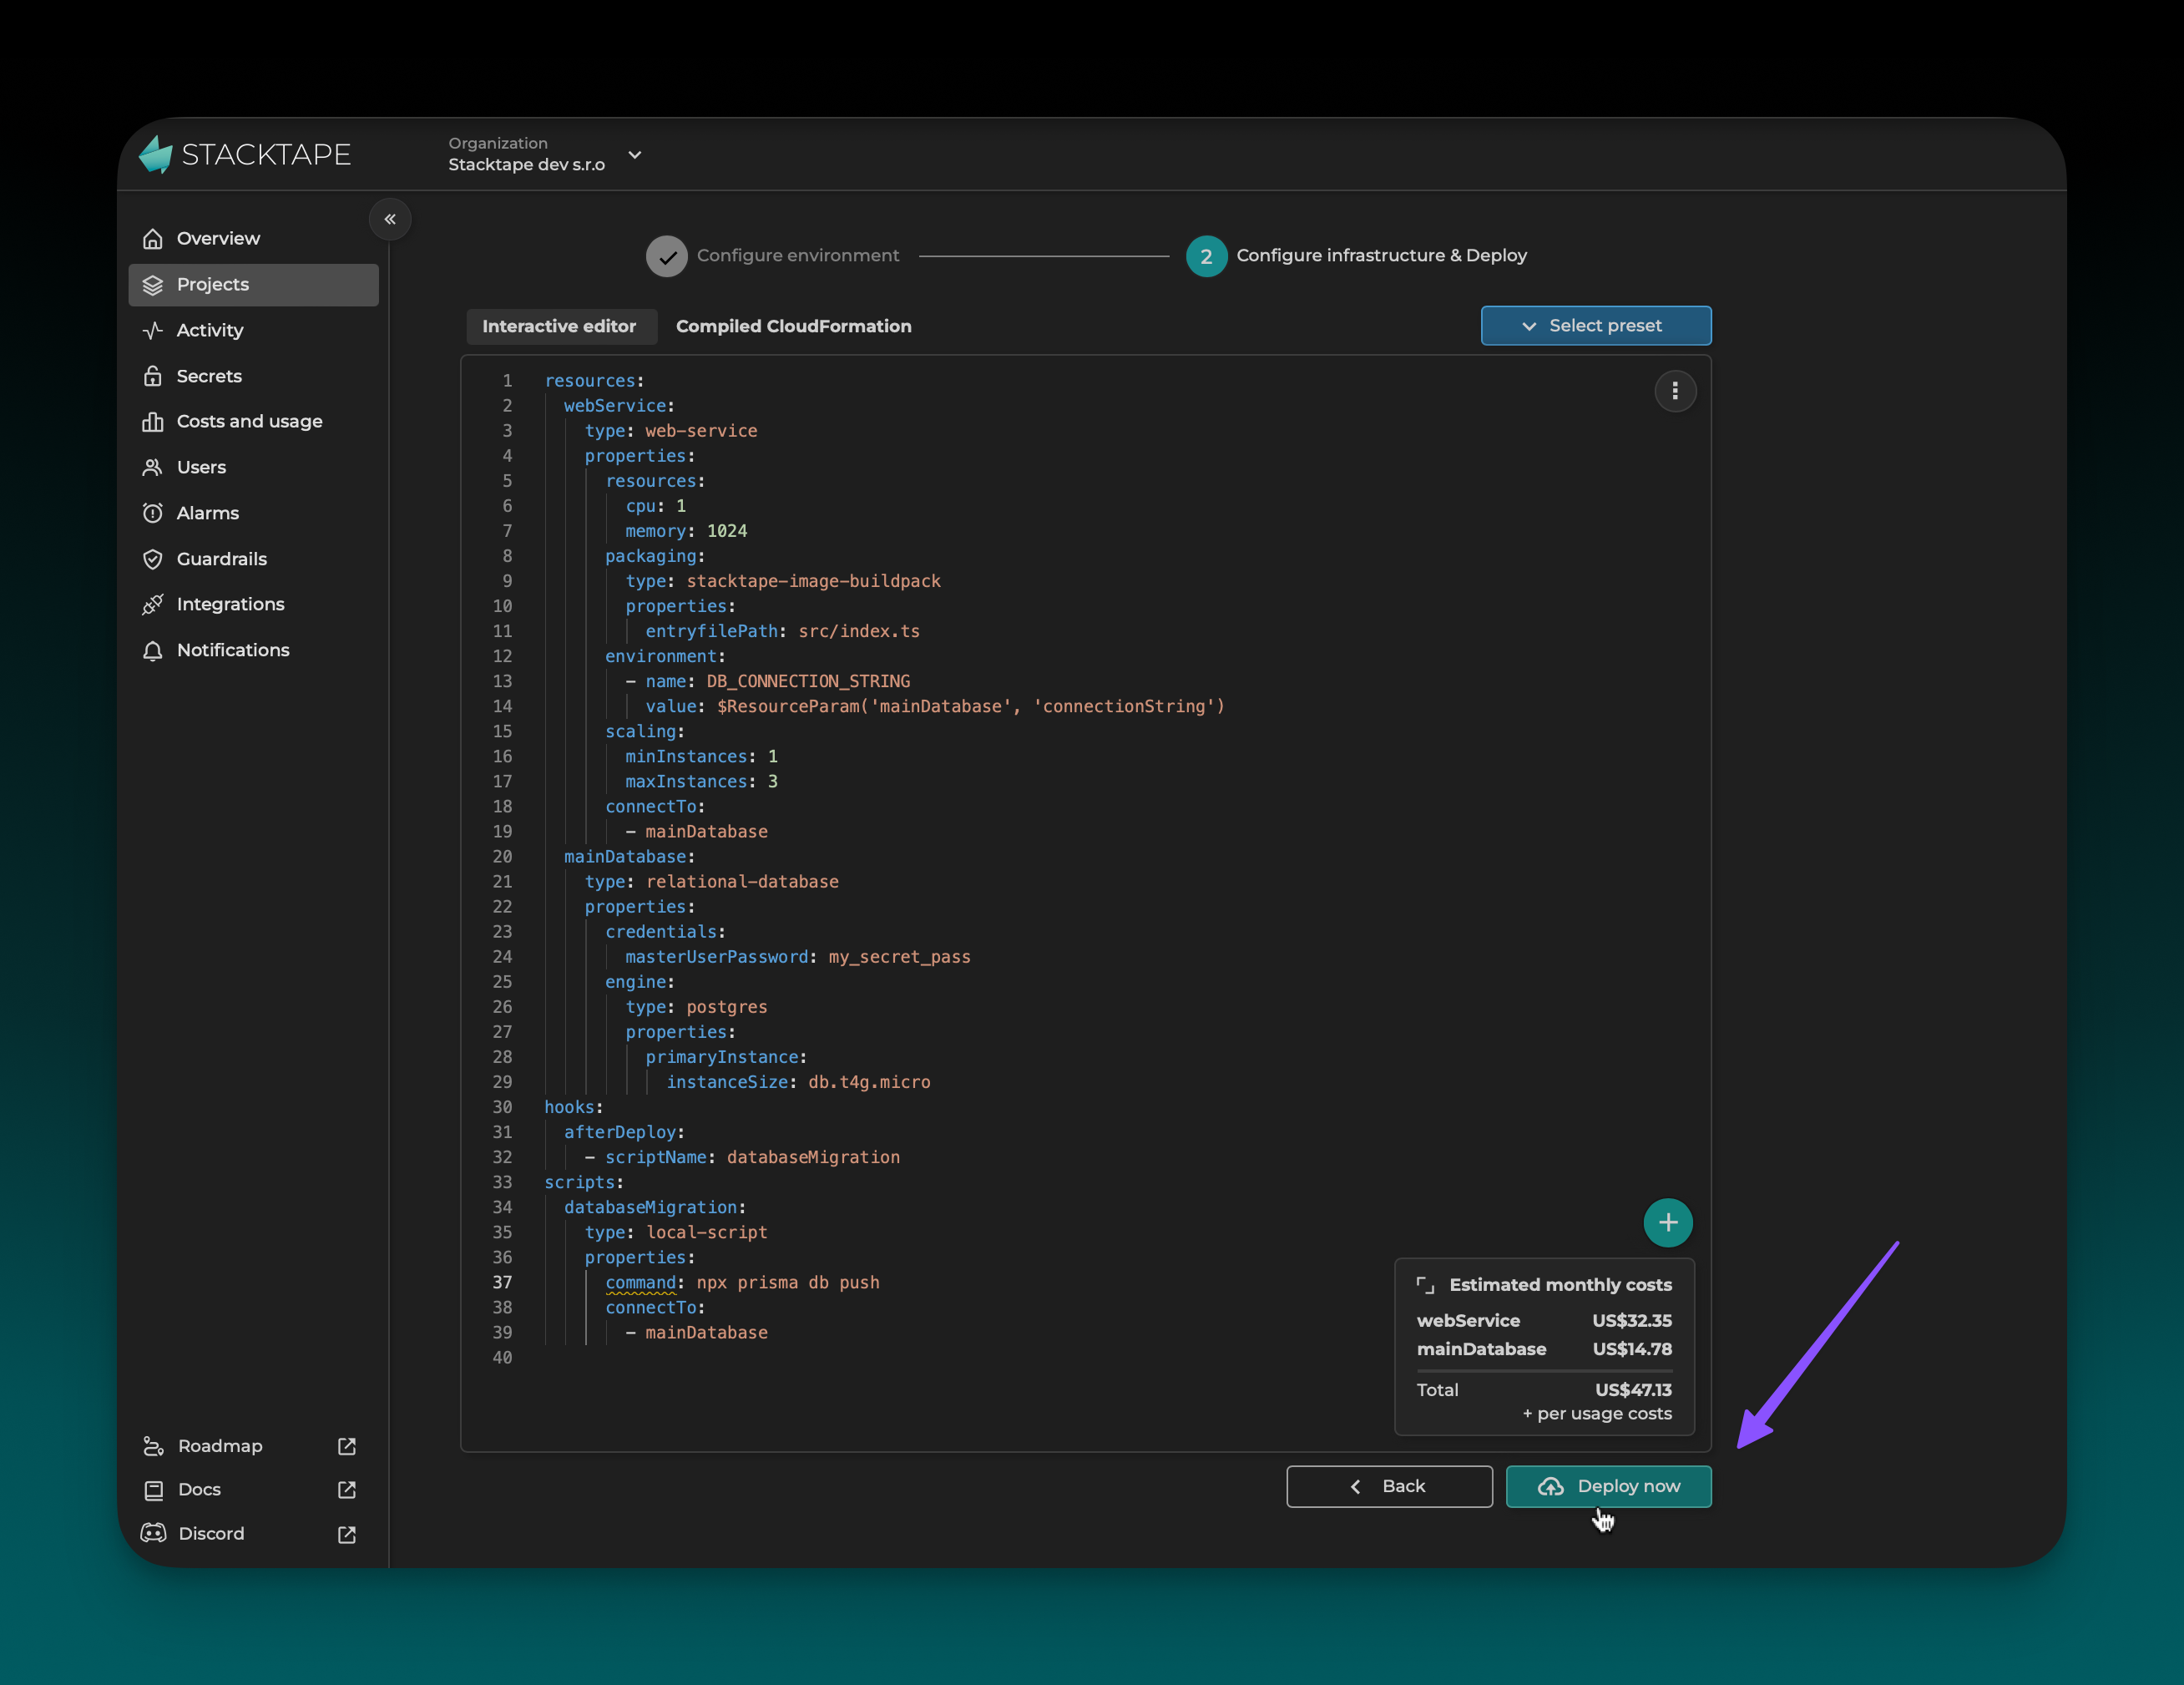
Create a Stacktape configuration
If your repository doesn't have a stacktape.yml or stacktape.ts file, you can create one using the interactive config editor.
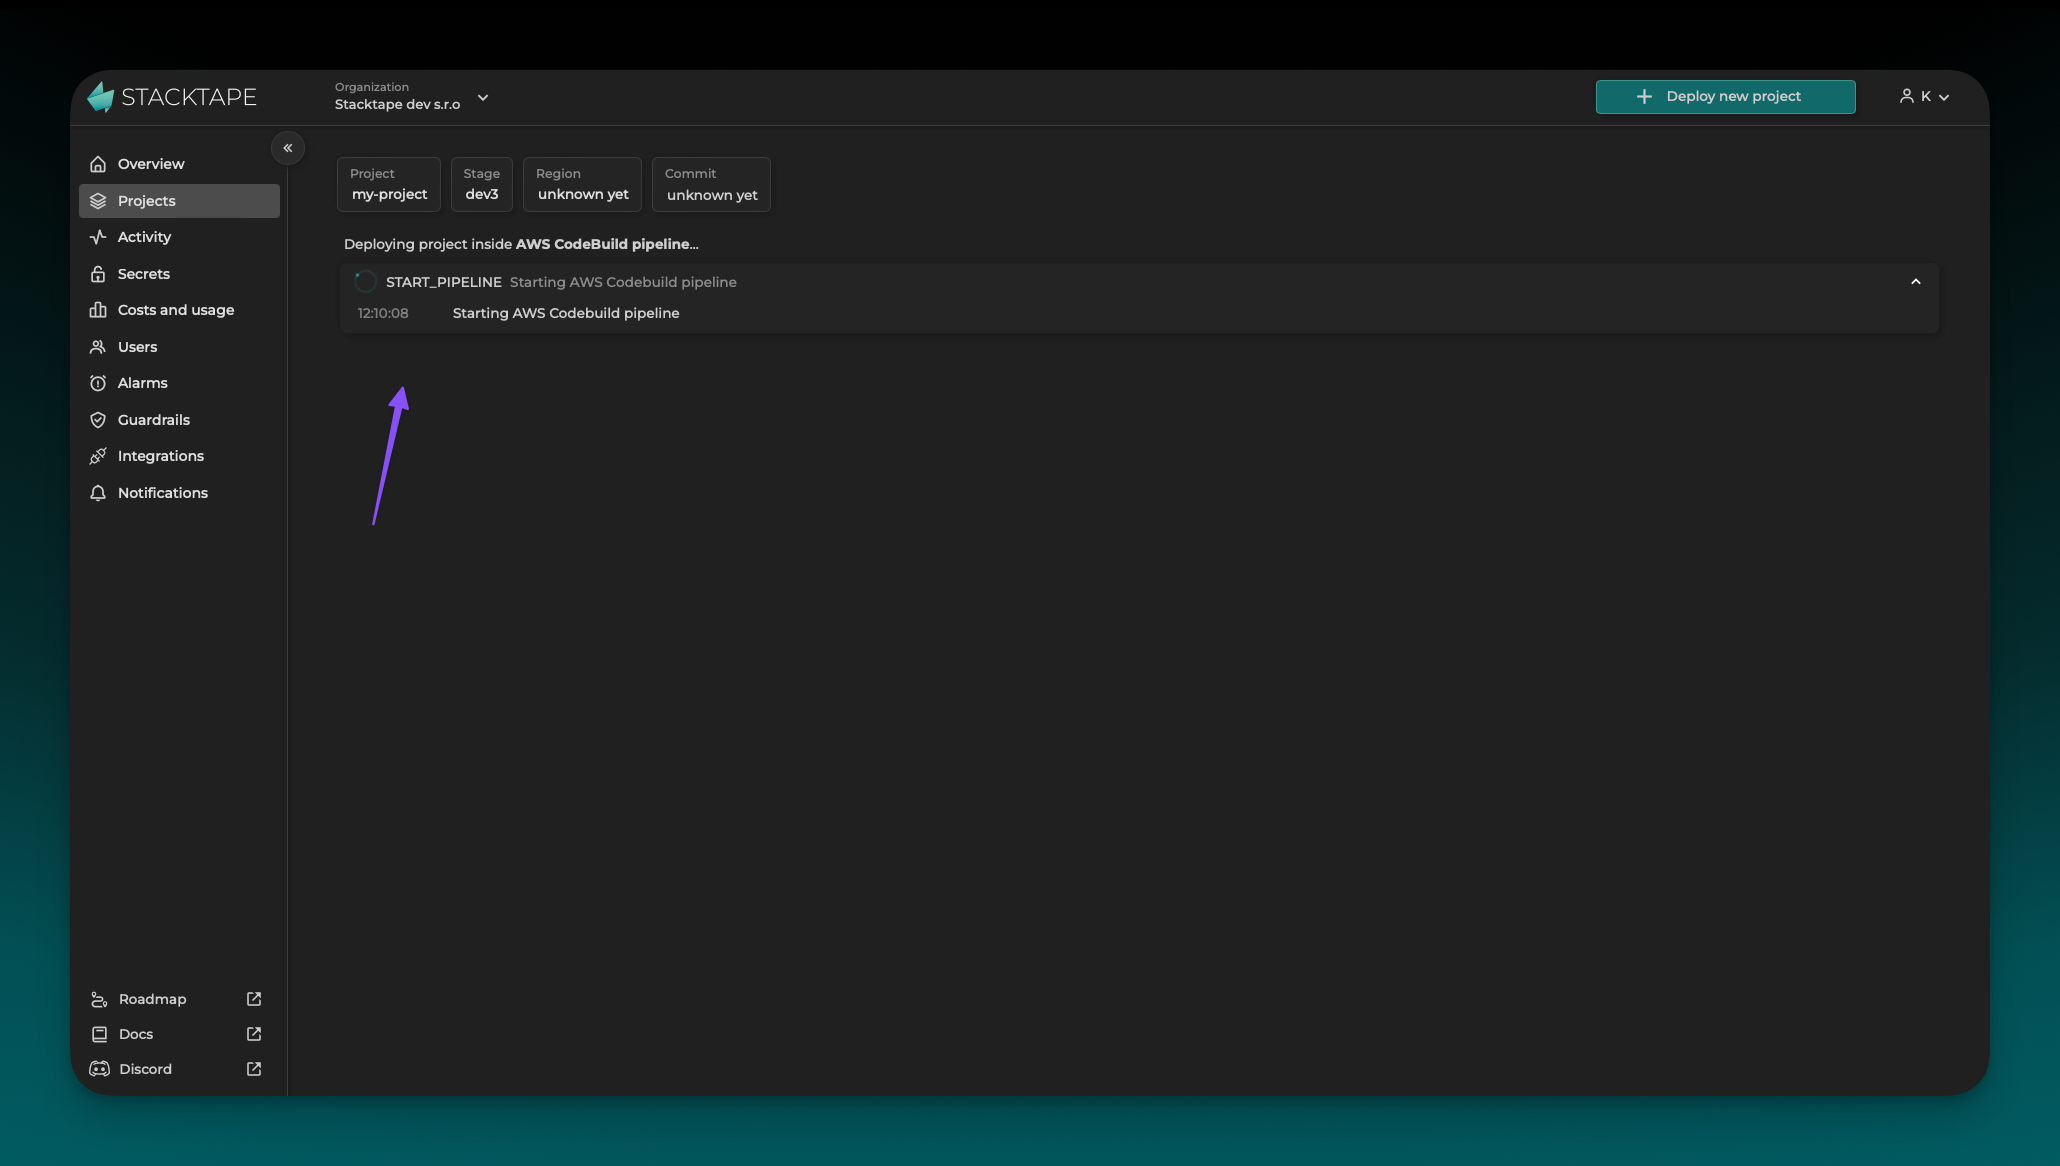
Deploy
Click Deploy now to start the deployment.
You can monitor the deployment progress in the console. Once it's complete, you'll be redirected to the stack details page.