Connect AWS Account
To deploy with Stacktape, you must have an AWS account connected to your organization. This guide will walk you through the process of connecting your AWS account to Stacktape.
Prerequisites
You must have an AWS account to complete this tutorial. If you do not have one, you can create one here.
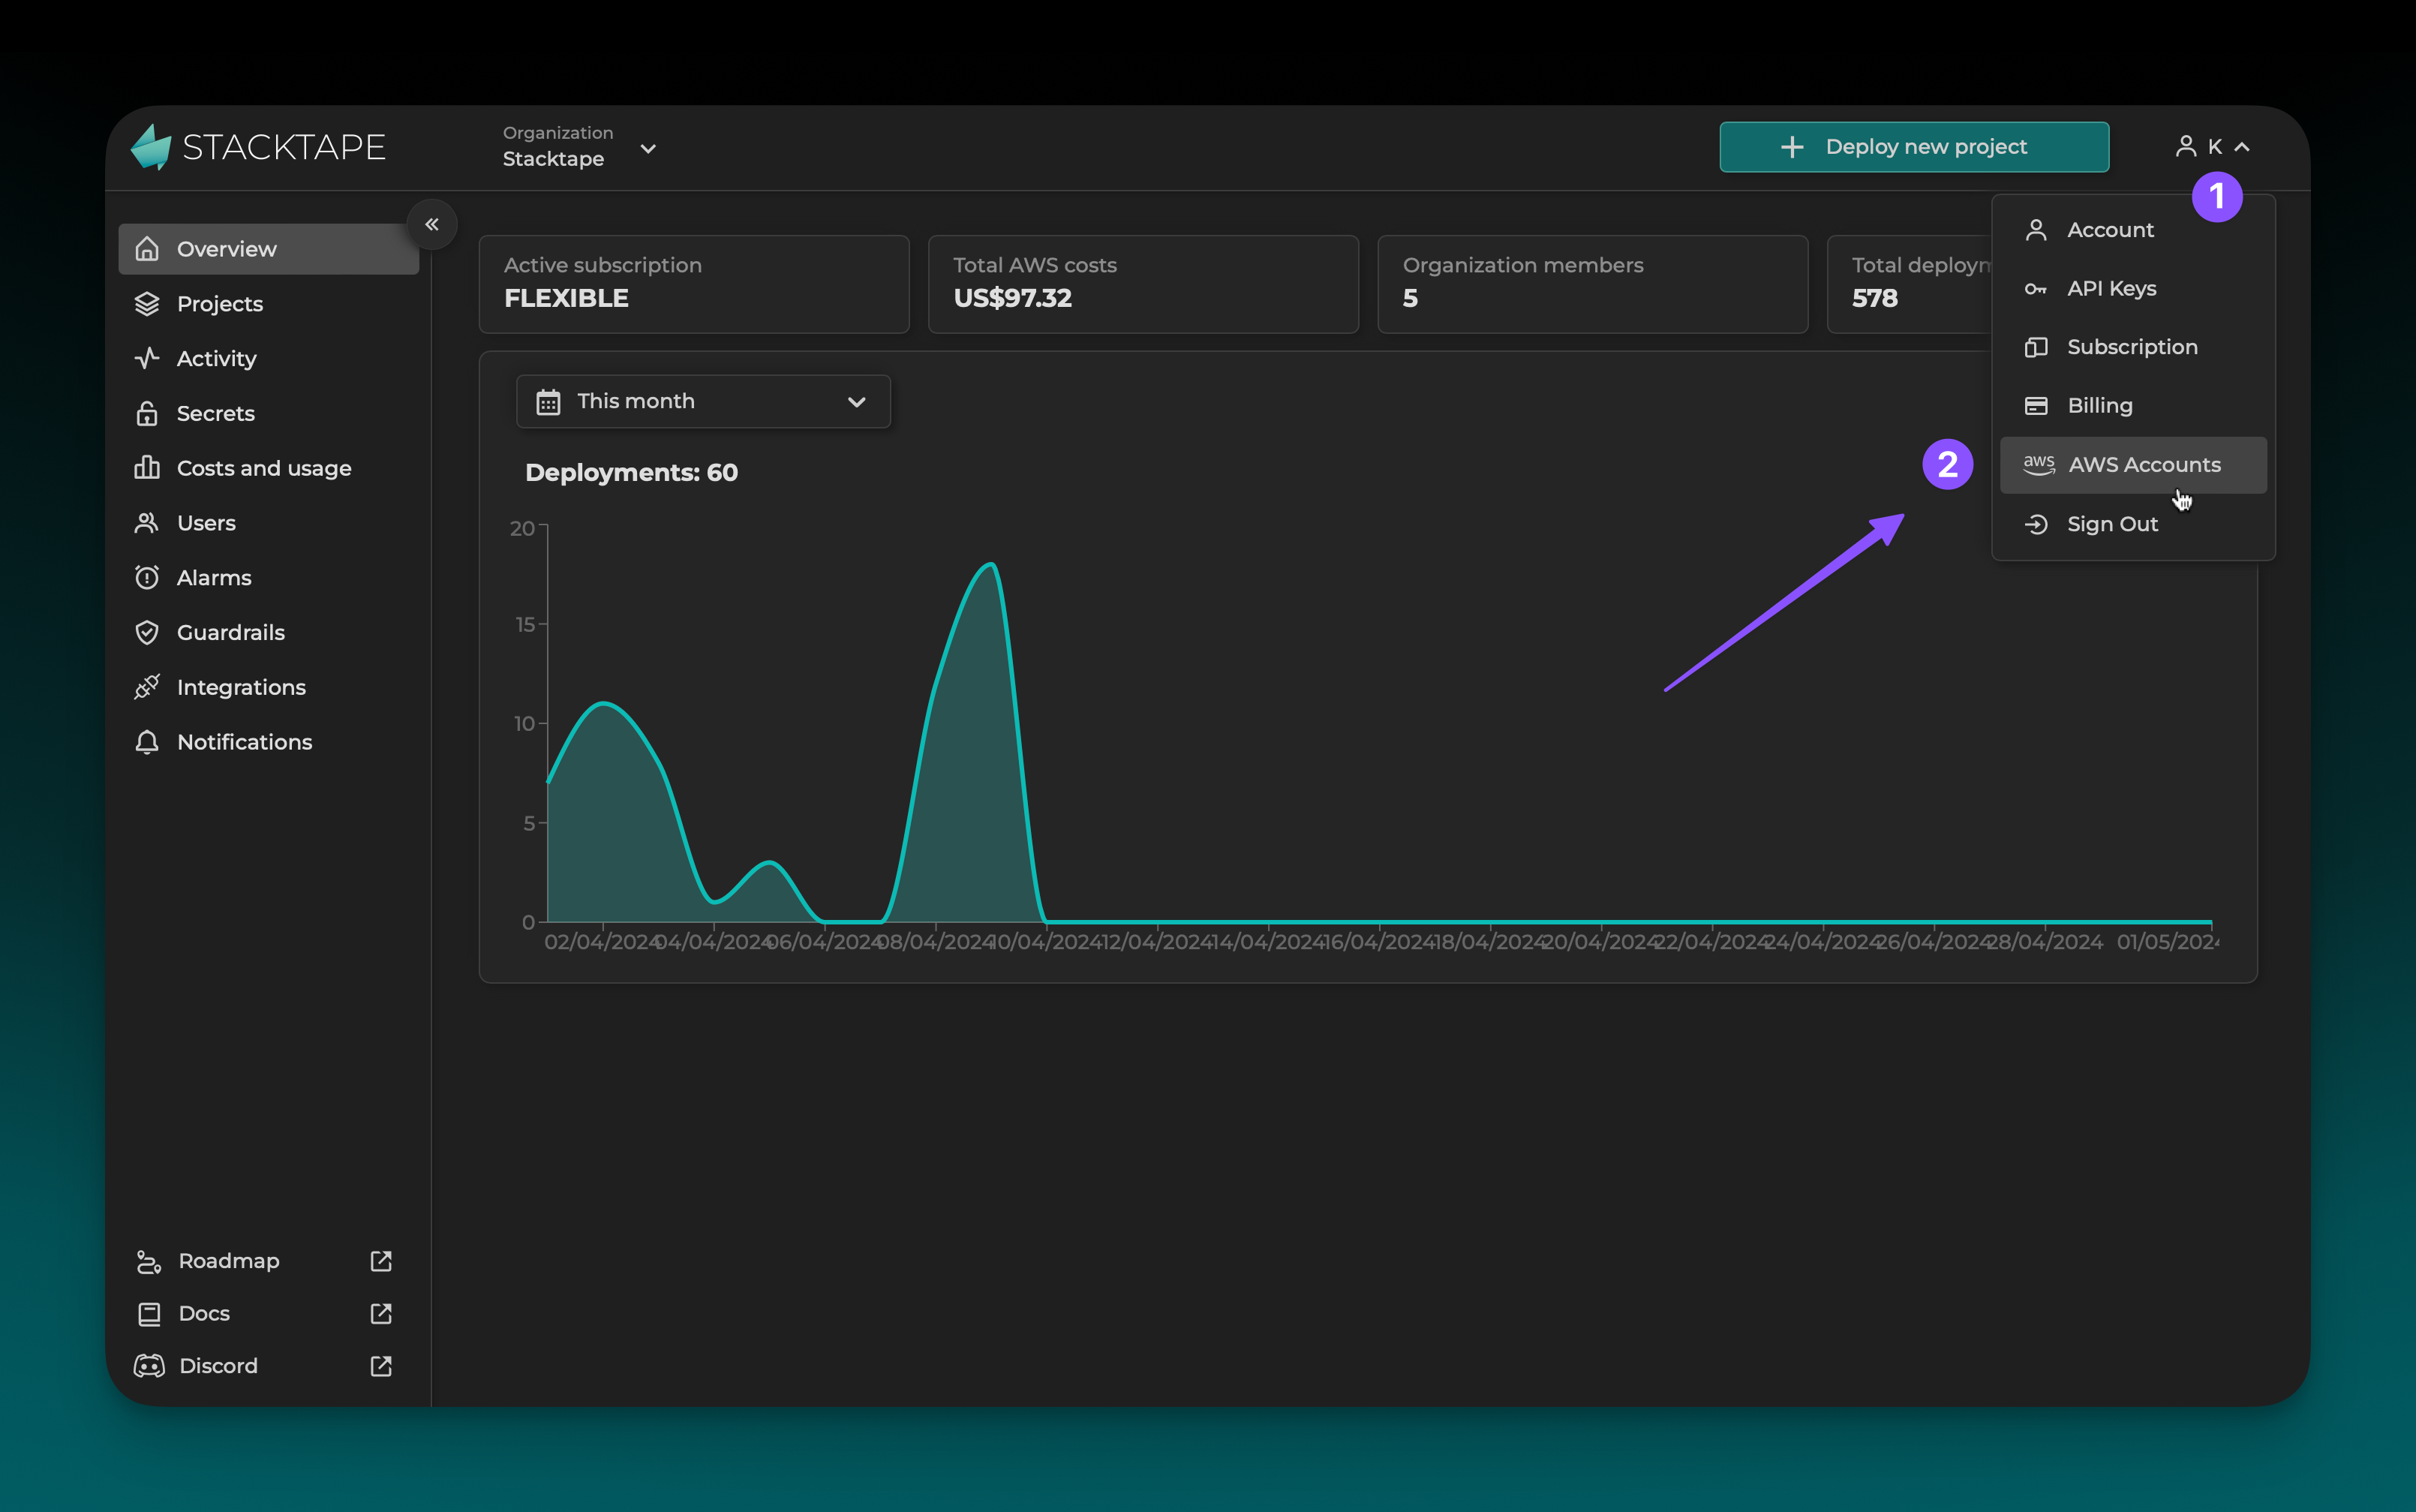
After signing in to the Stacktape Console, navigate to the AWS accounts page.
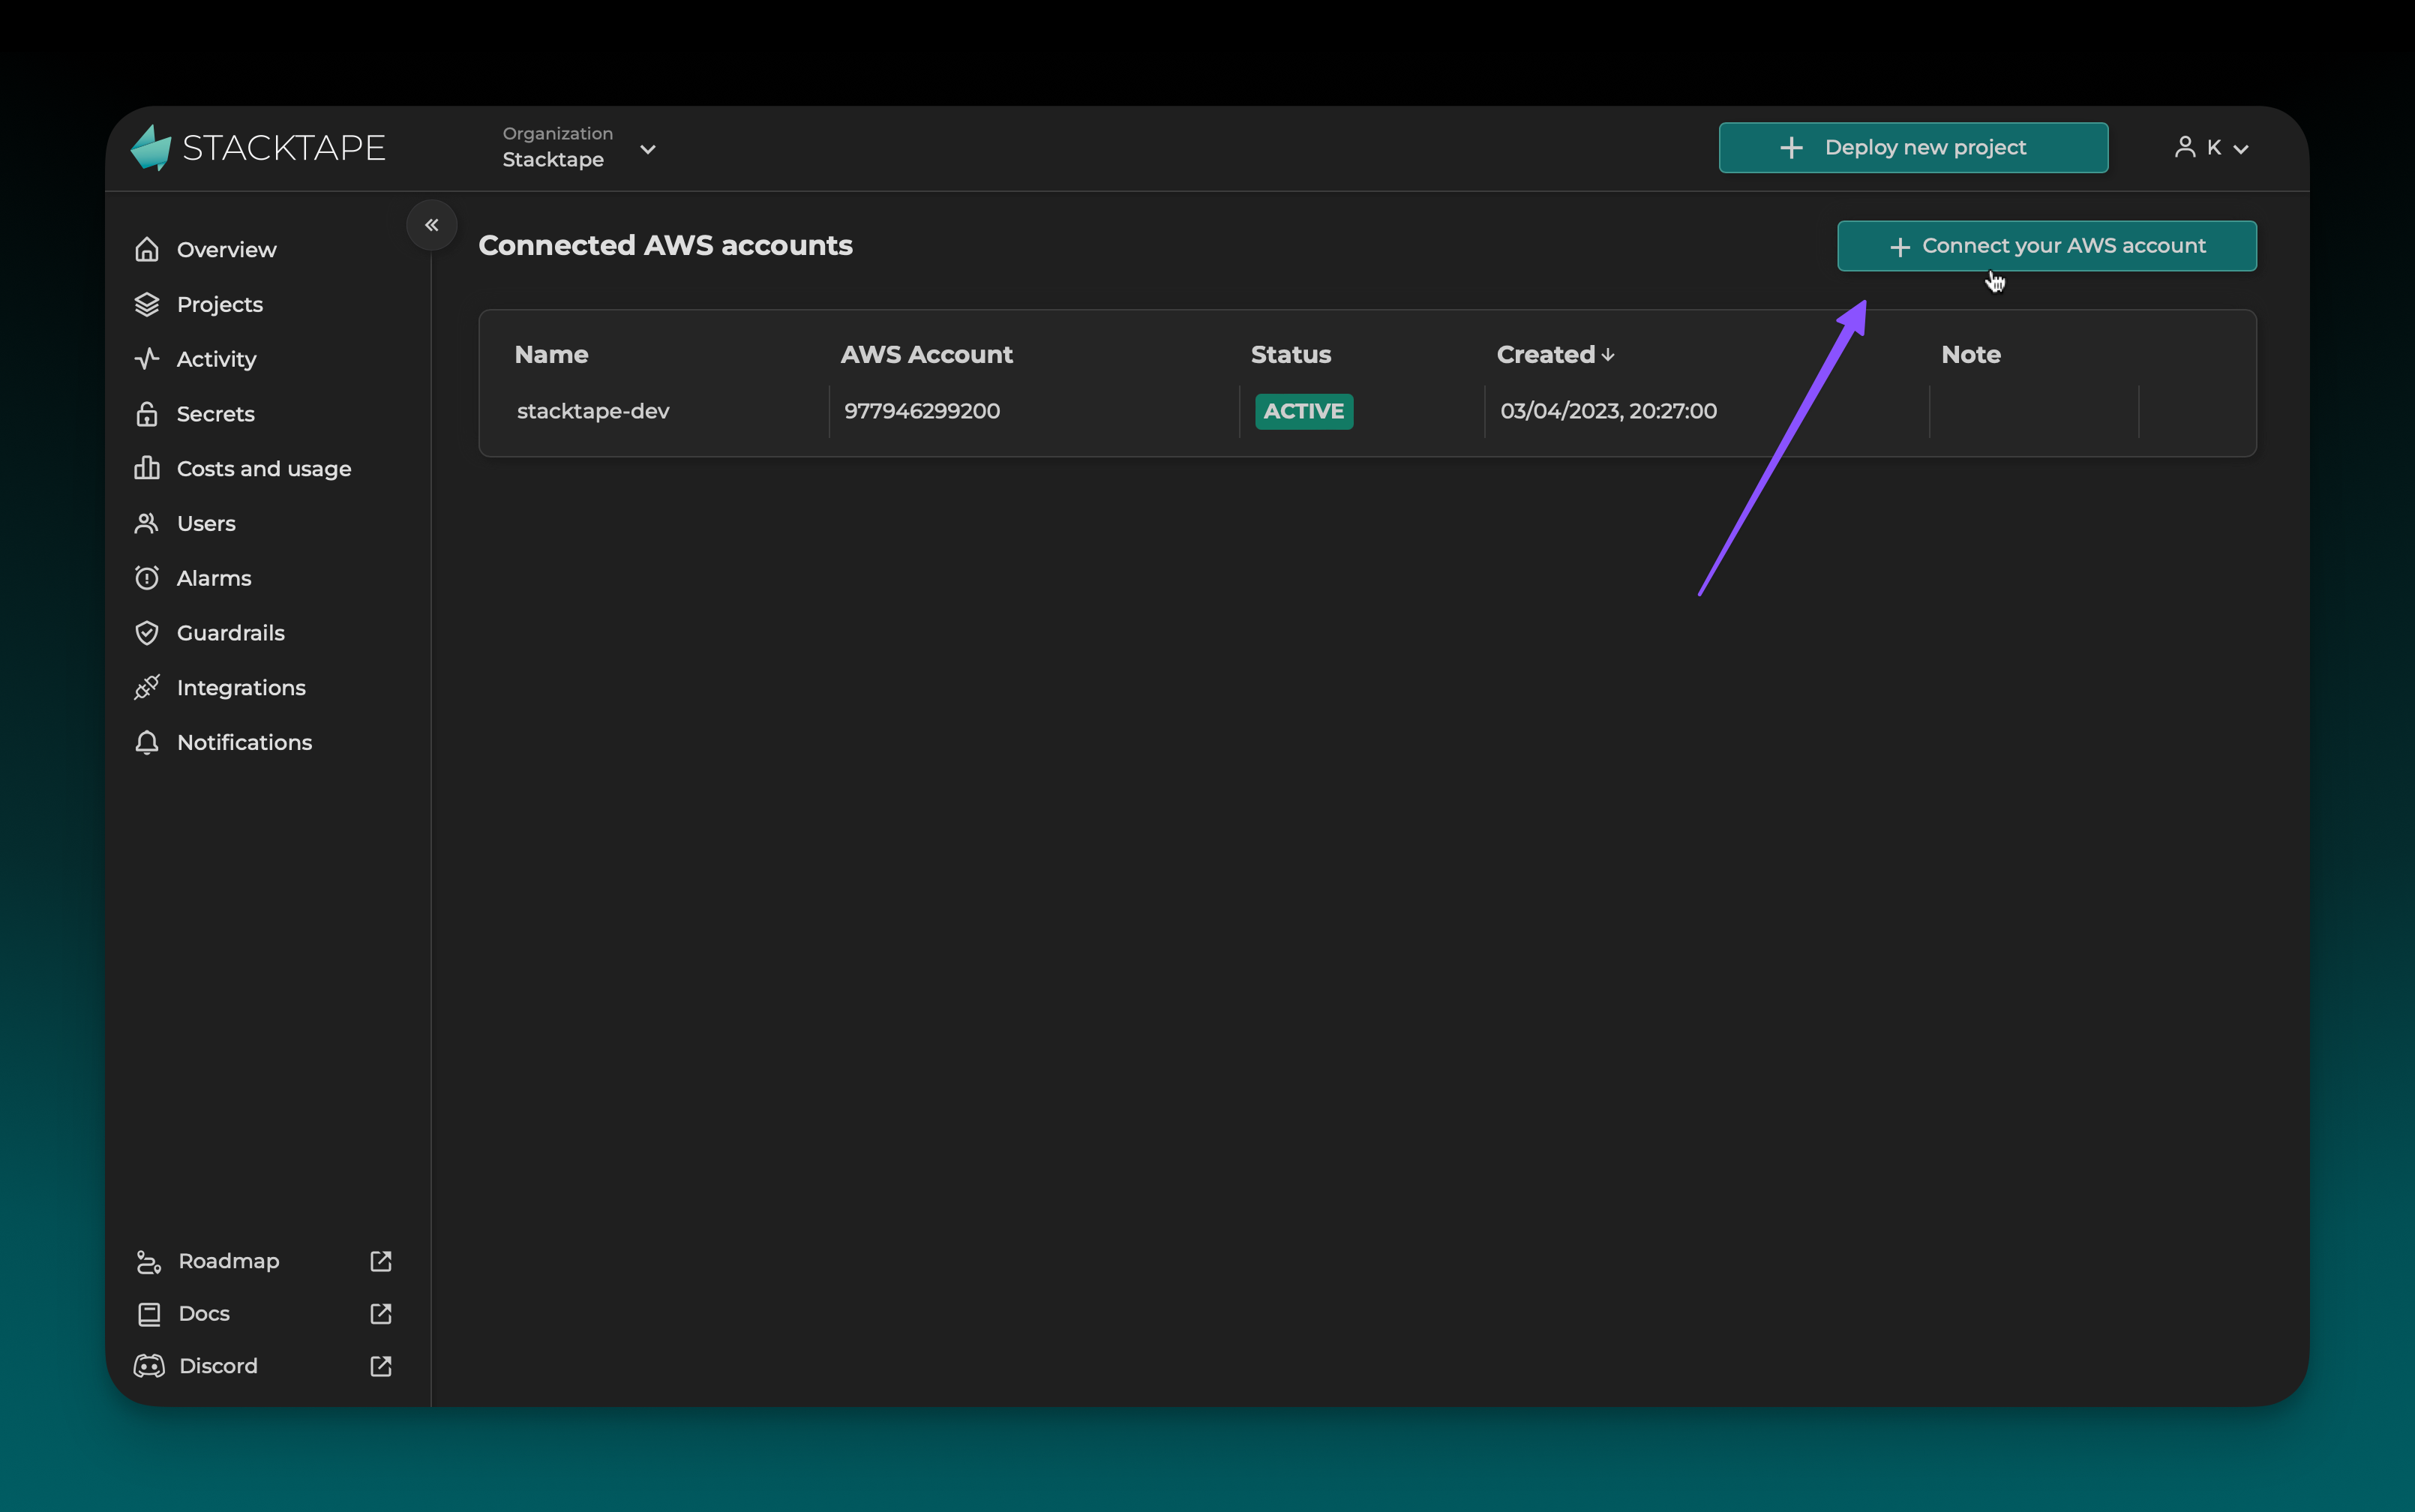
Step 2: Initiate the connection
Click the Connect your AWS account button.
Fill in the Account name. This will be used to identify your AWS account within your Stacktape organization. Then, click Connect Account in AWS Console. You will be redirected to the AWS Management Console.
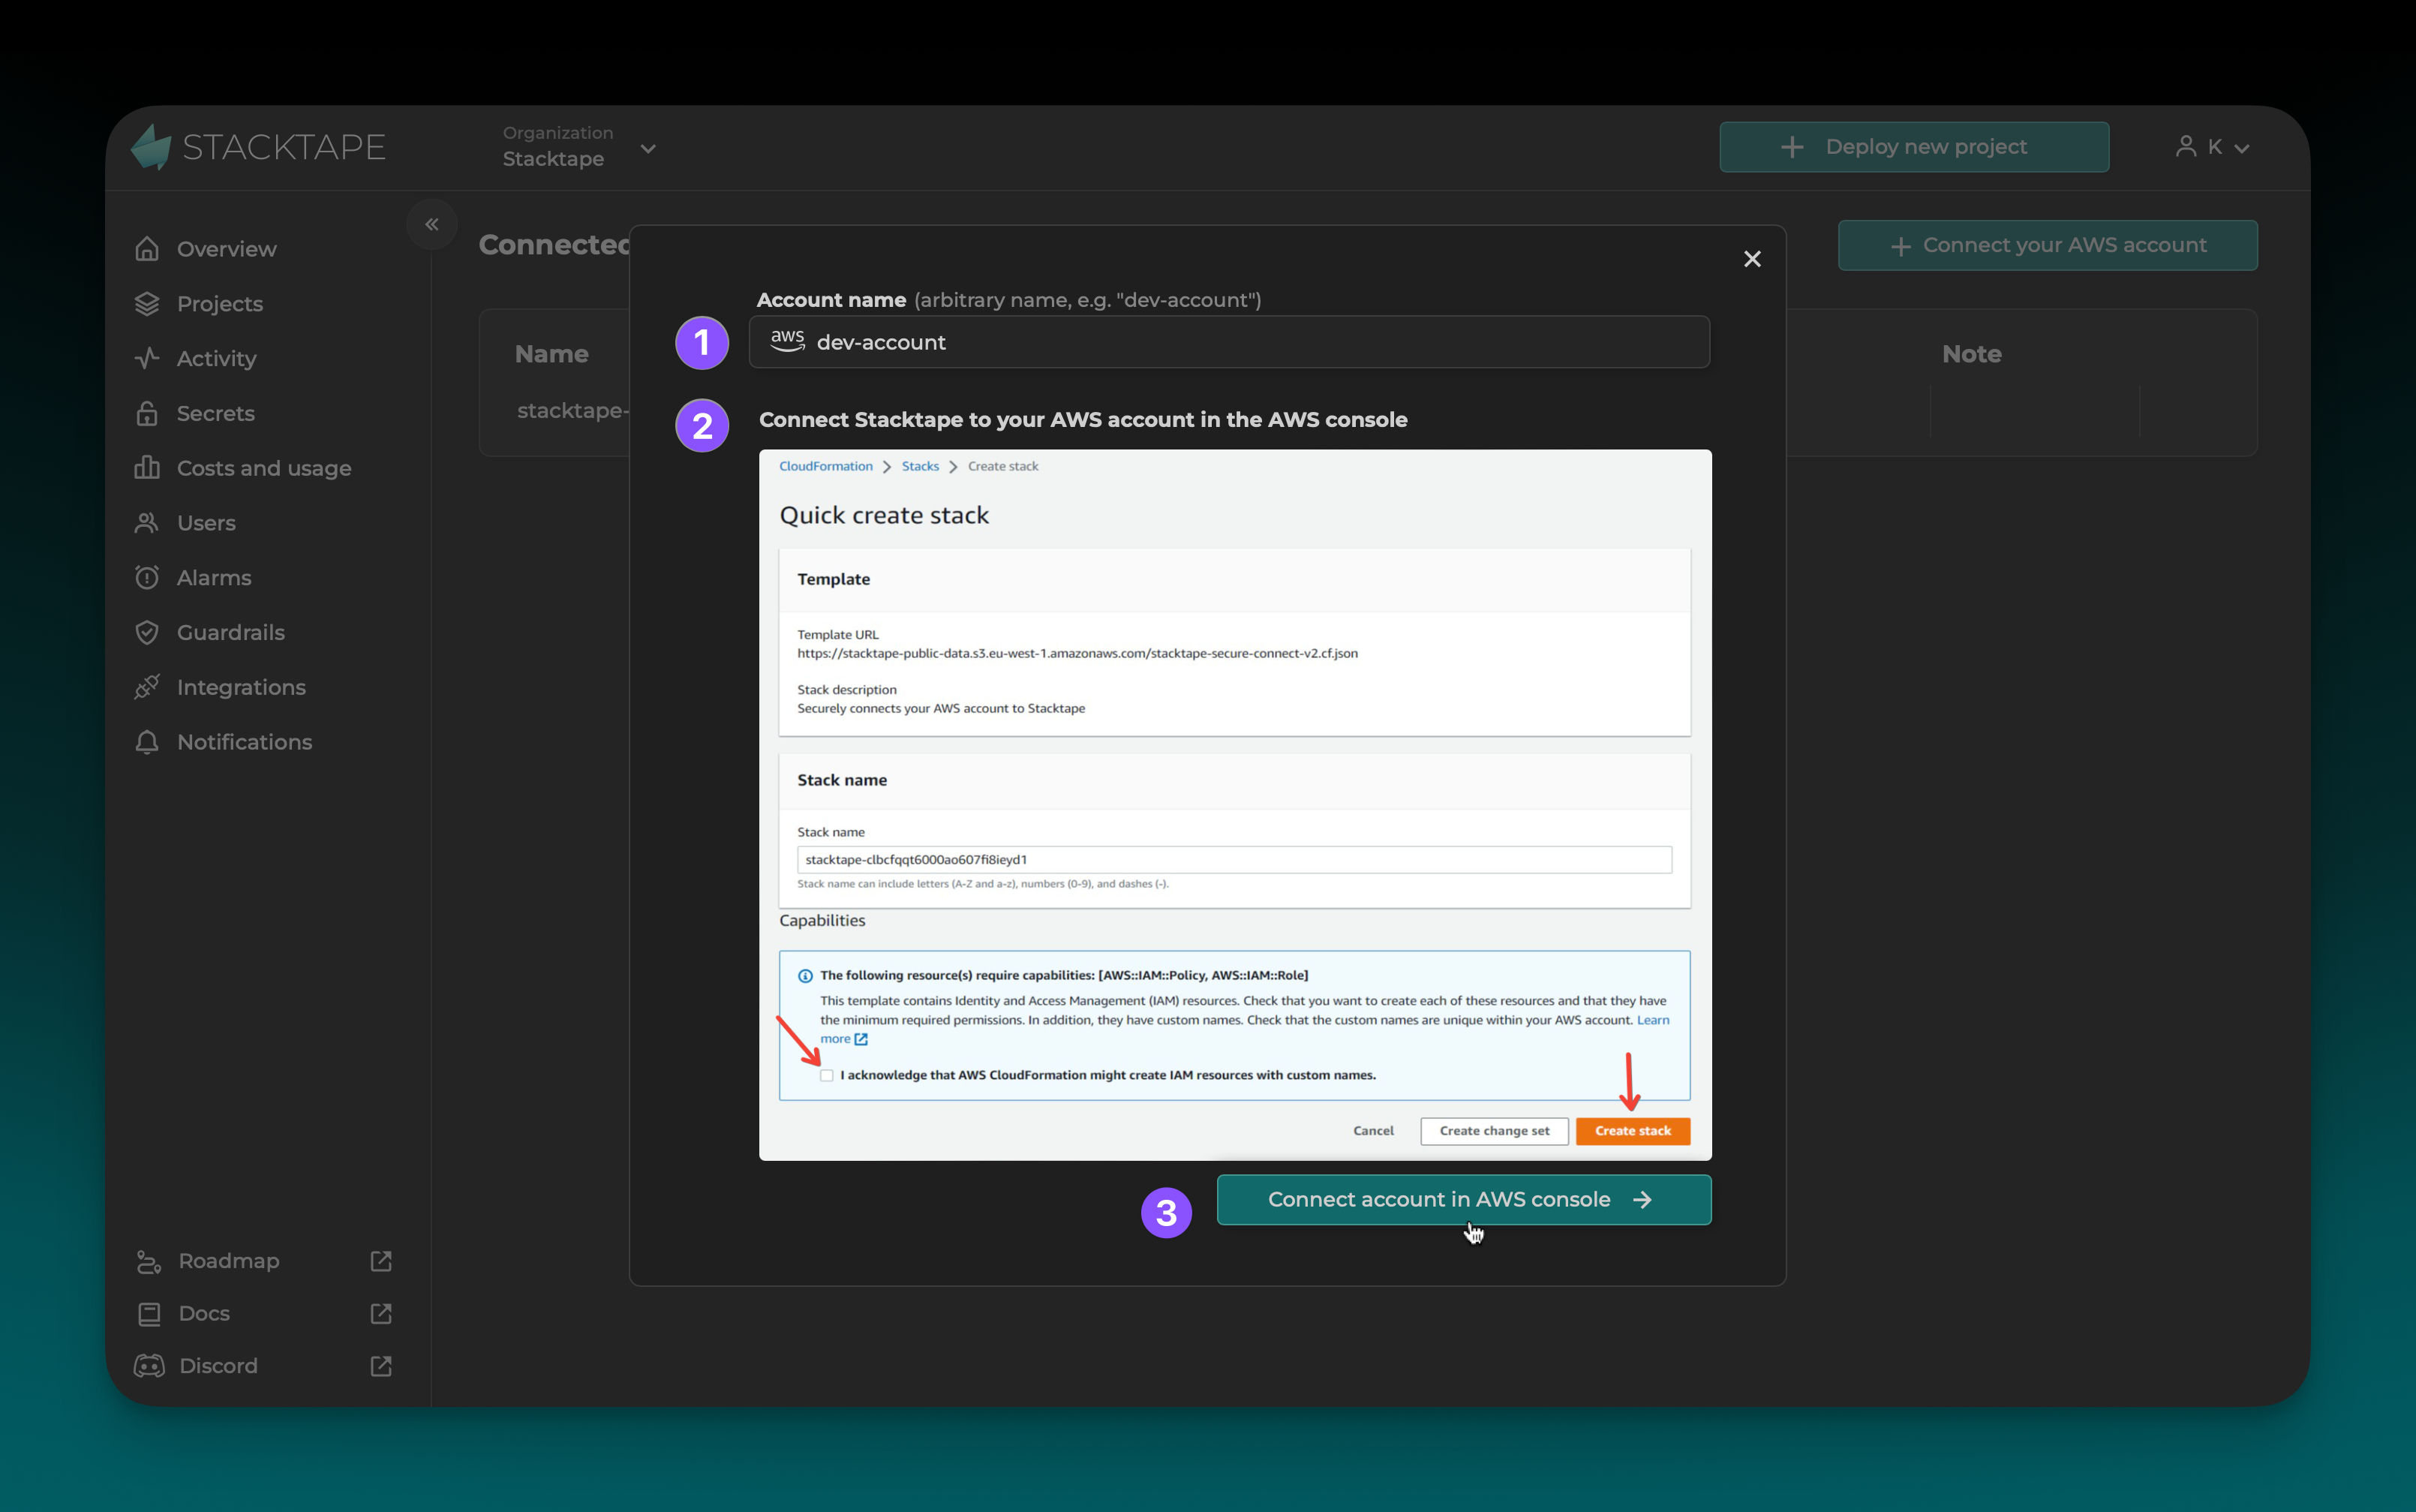
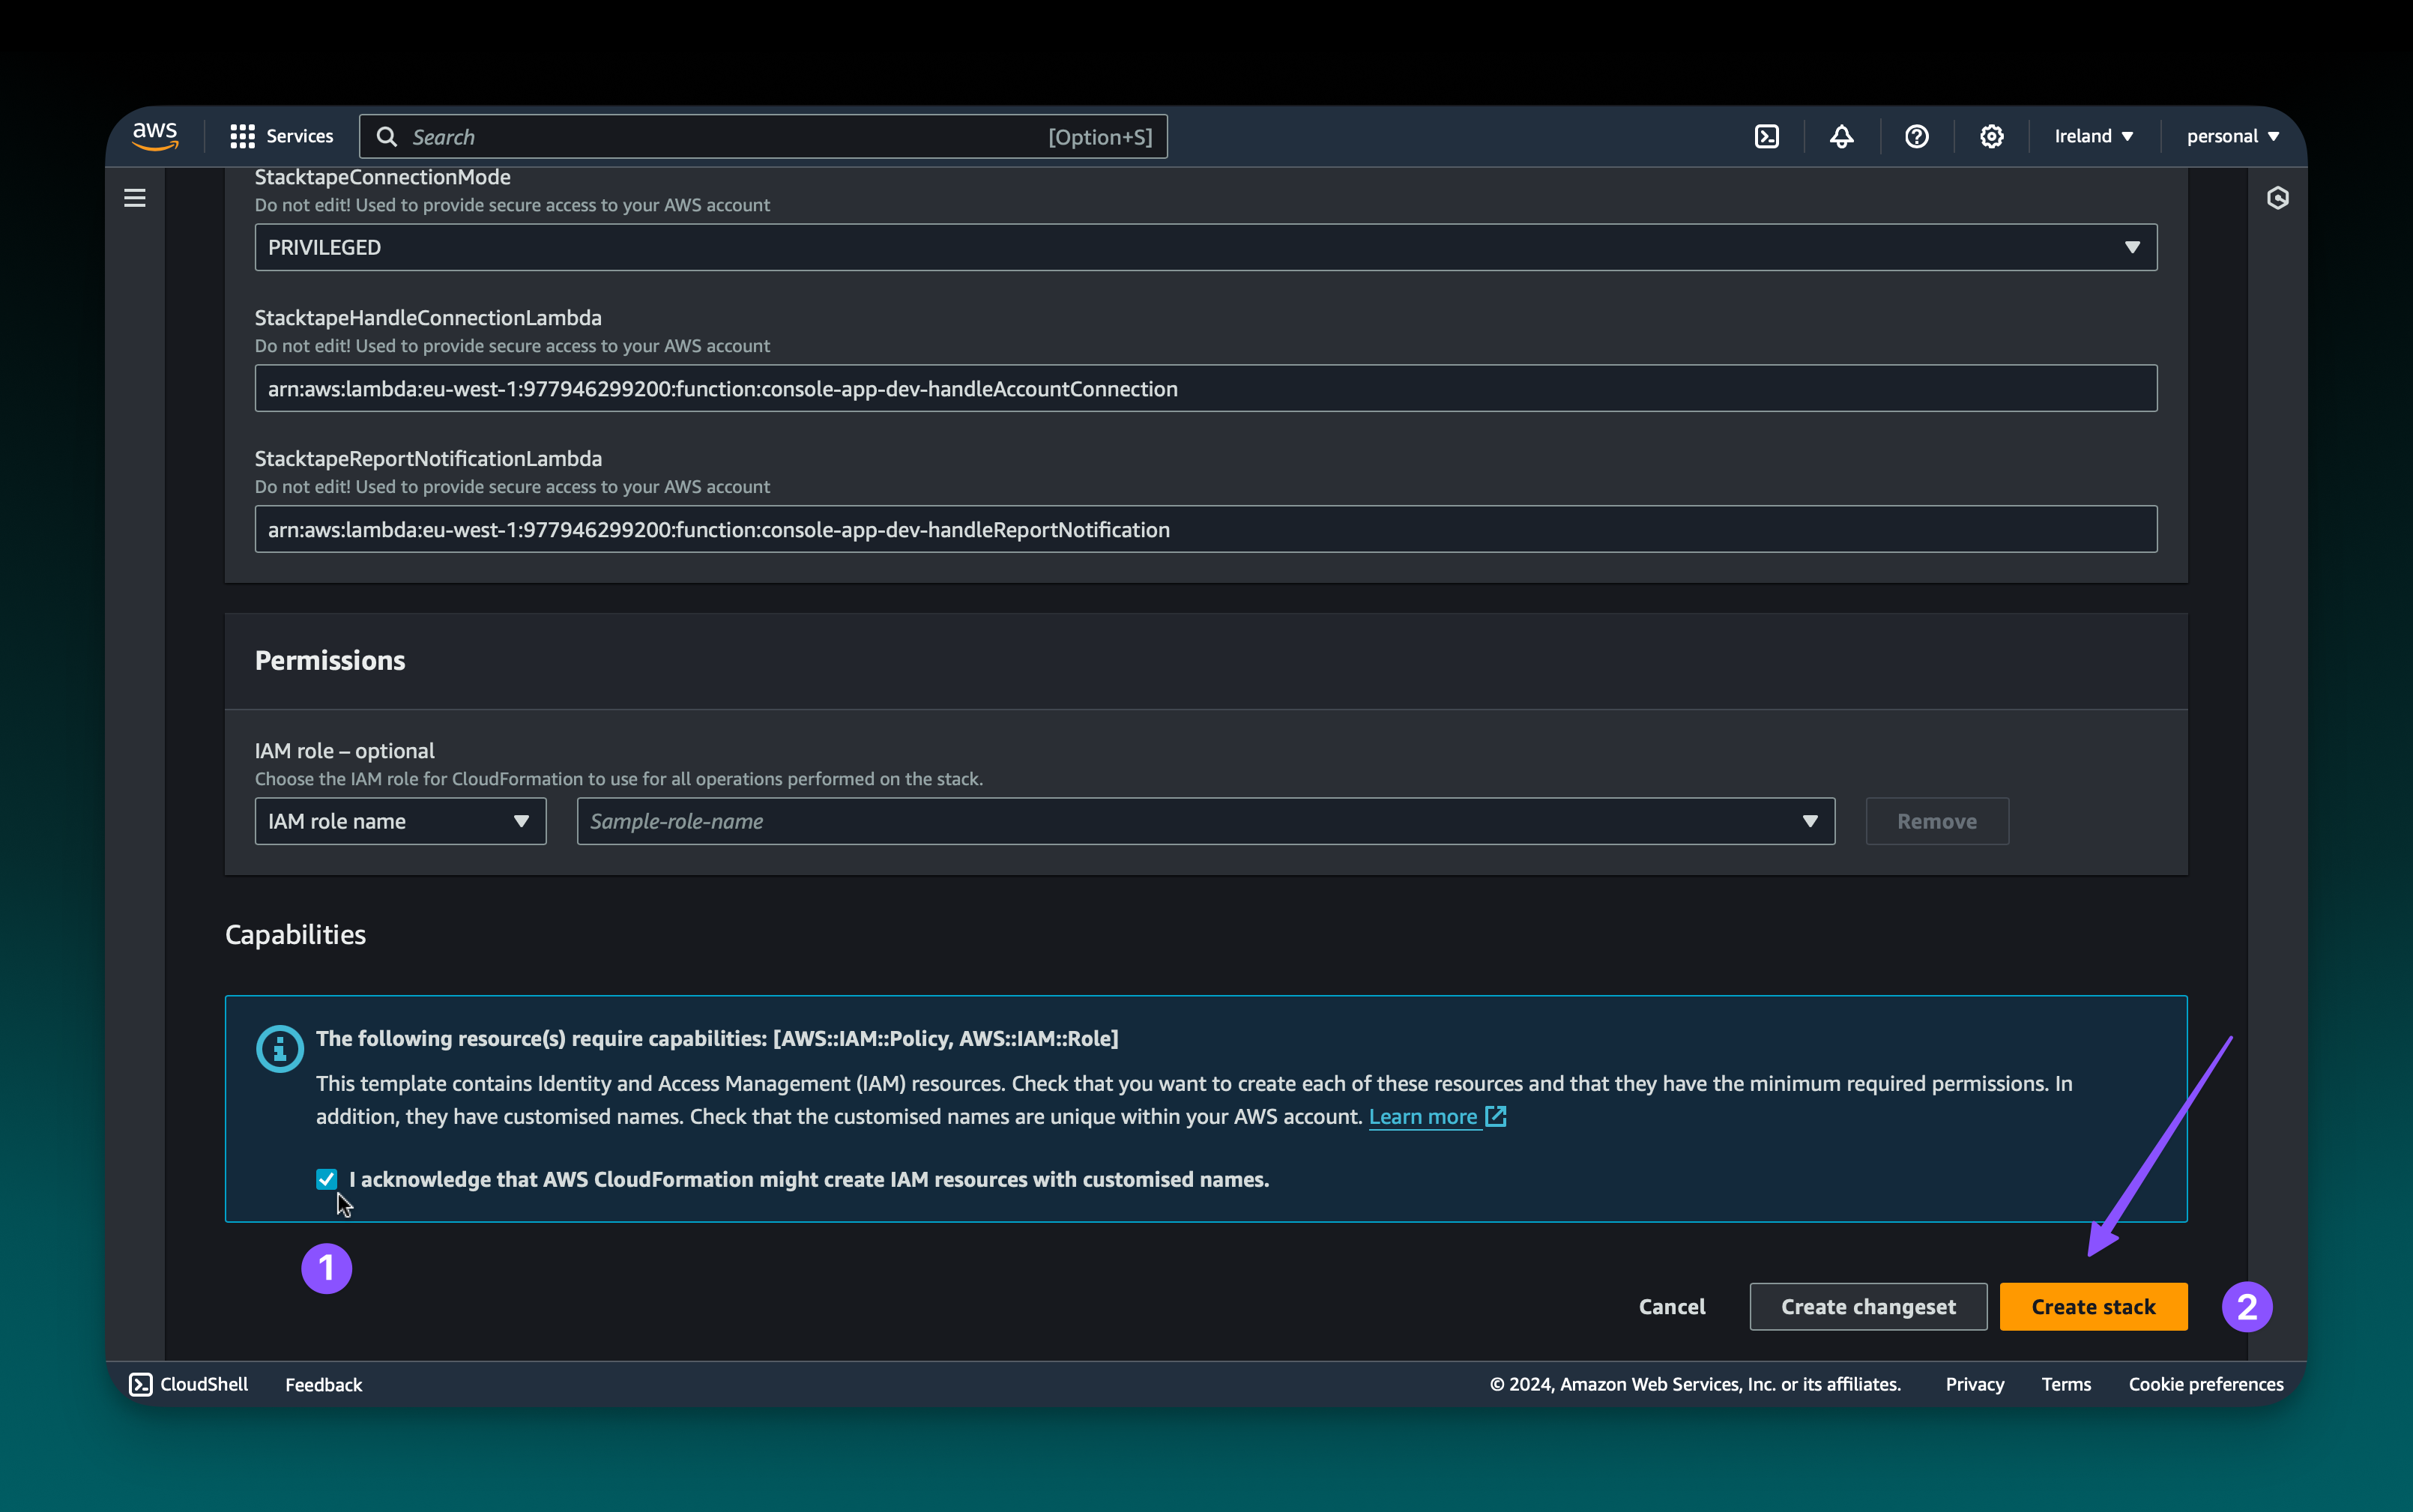
Step 3: Create the connection stack
In the AWS Management Console, you will be prompted to create the connection stack. This is a set of resources that are required for Stacktape to connect to your AWS account. It includes an S3 bucket for collecting cost reports (for Stacktape's cost analysis feature) and an IAM role that allows Stacktape to access your AWS account.
The connection stack and its resources are free and will not incur any noticeable costs.
If you delete the connection stack in the AWS Management Console, you will no longer be able to use Stacktape.
After you confirm the stack creation, the stack will be created. This process usually takes about a minute.
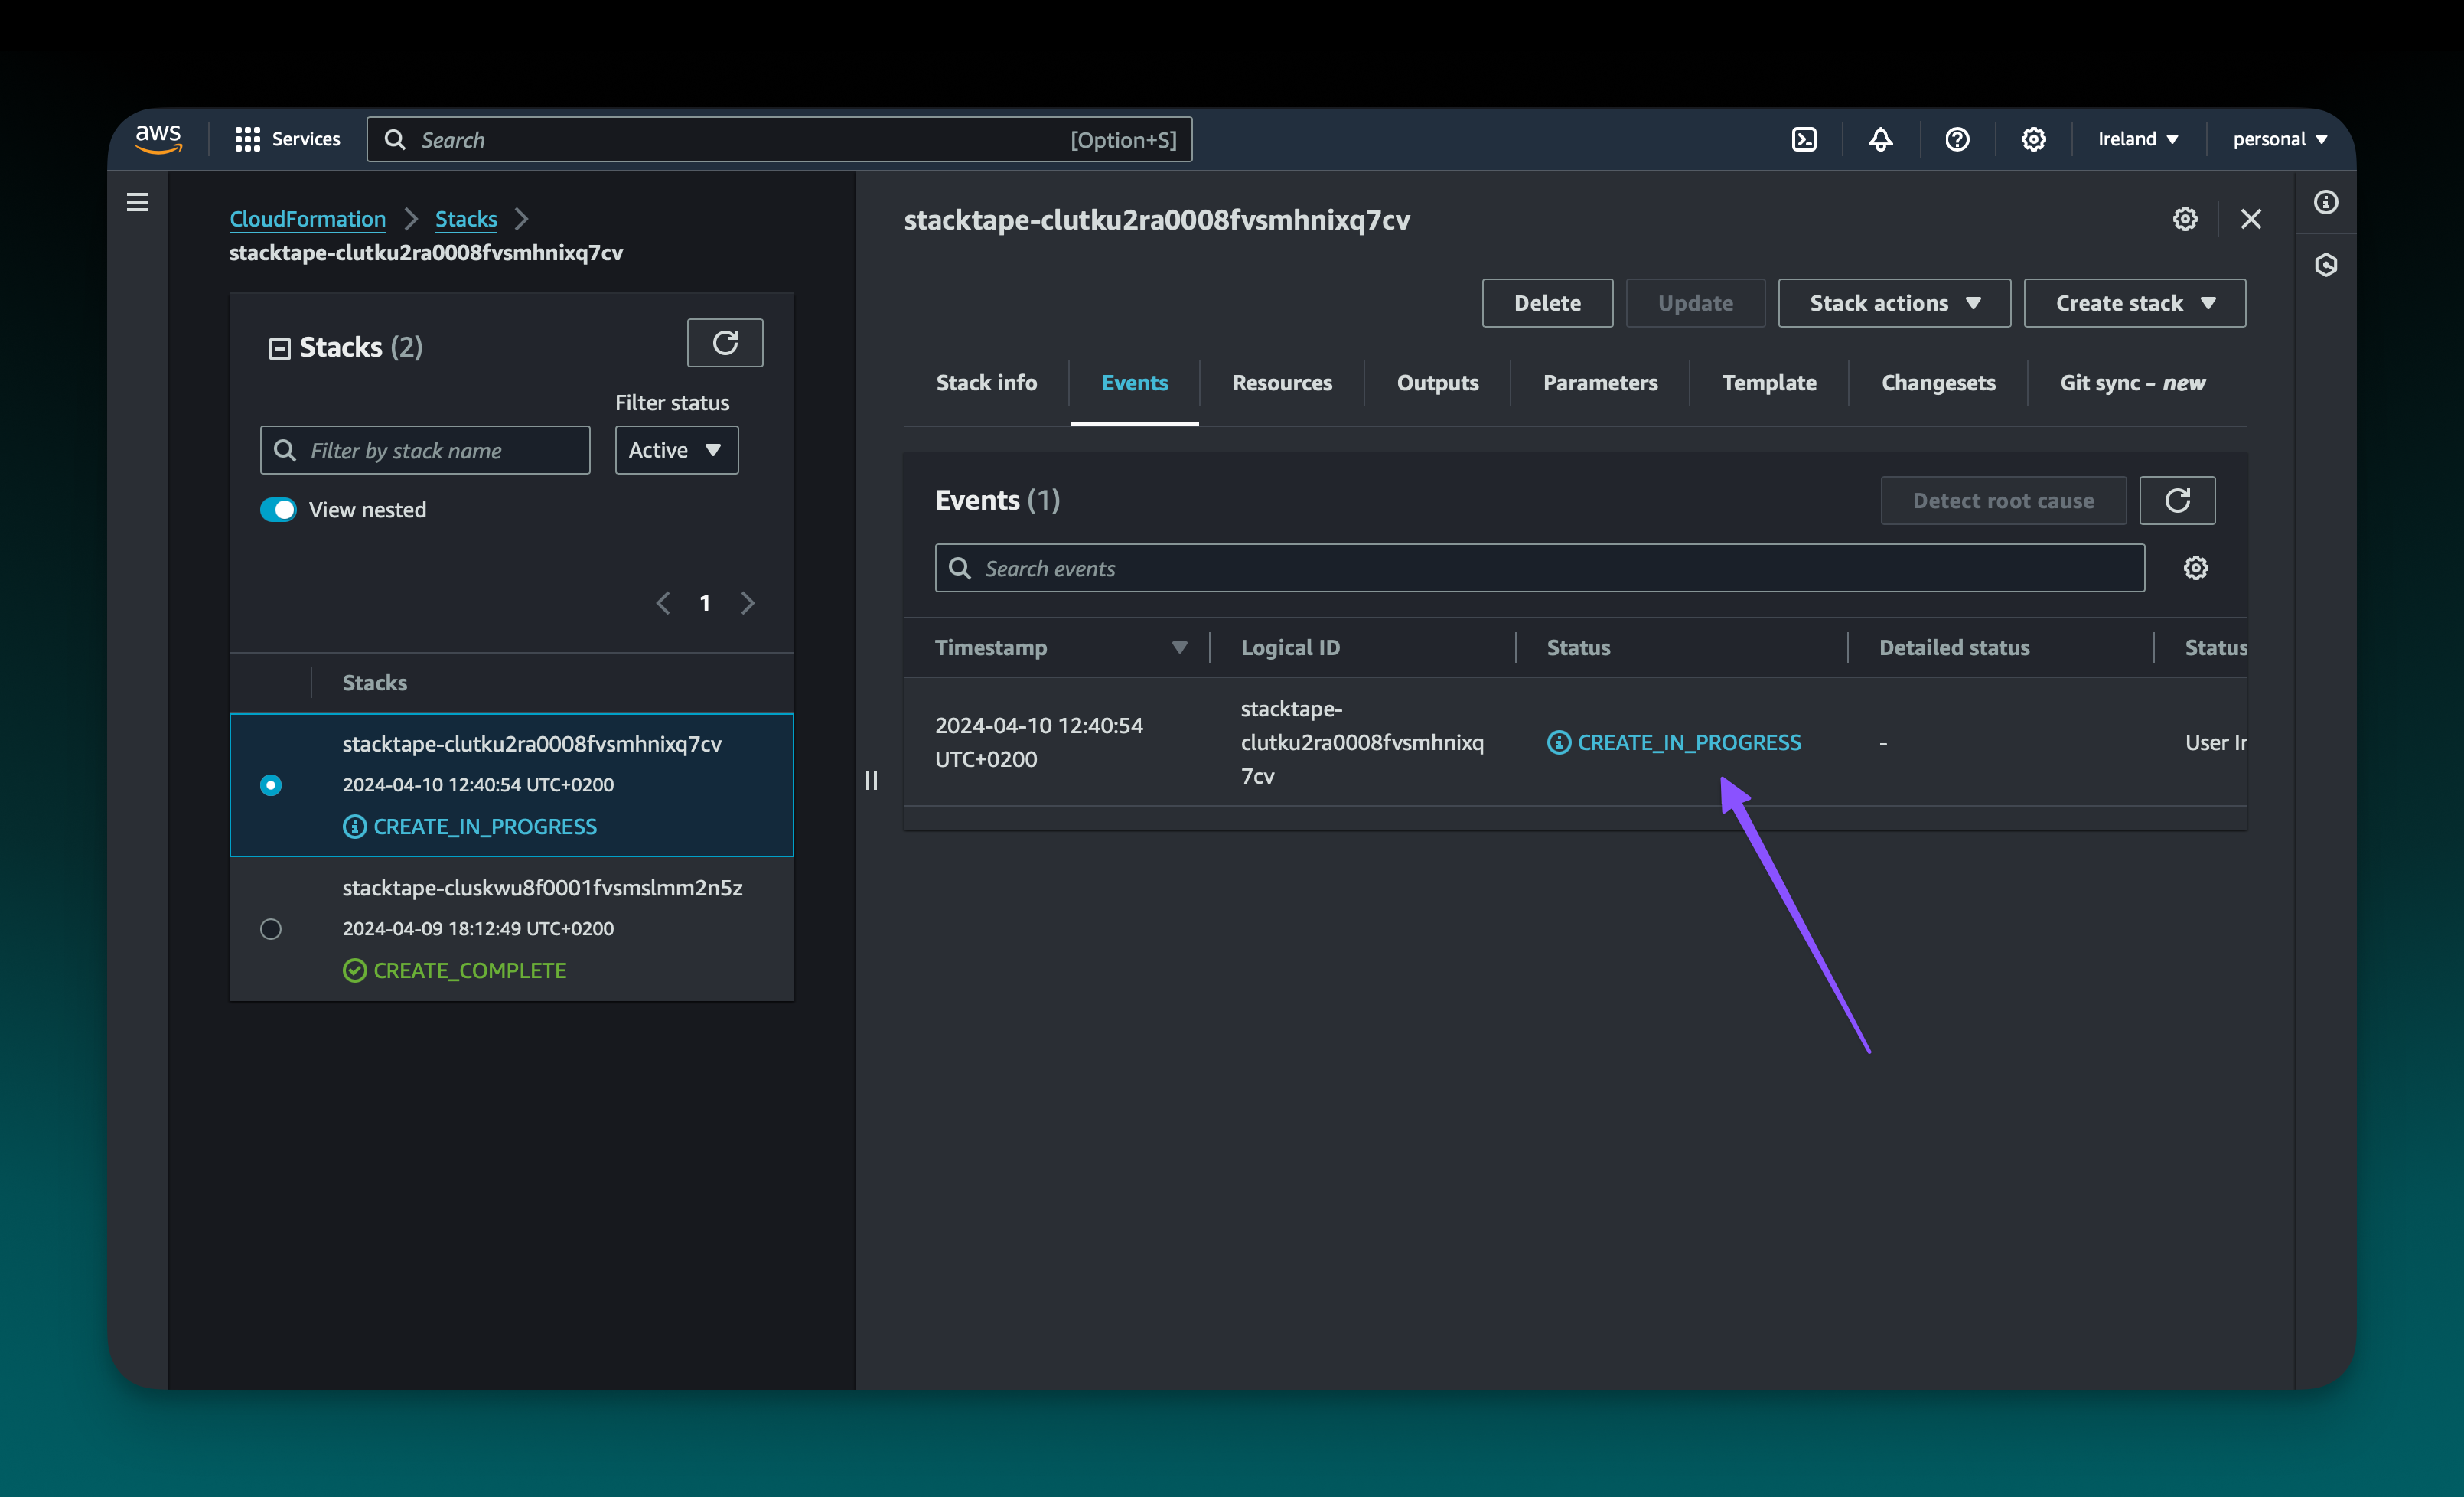
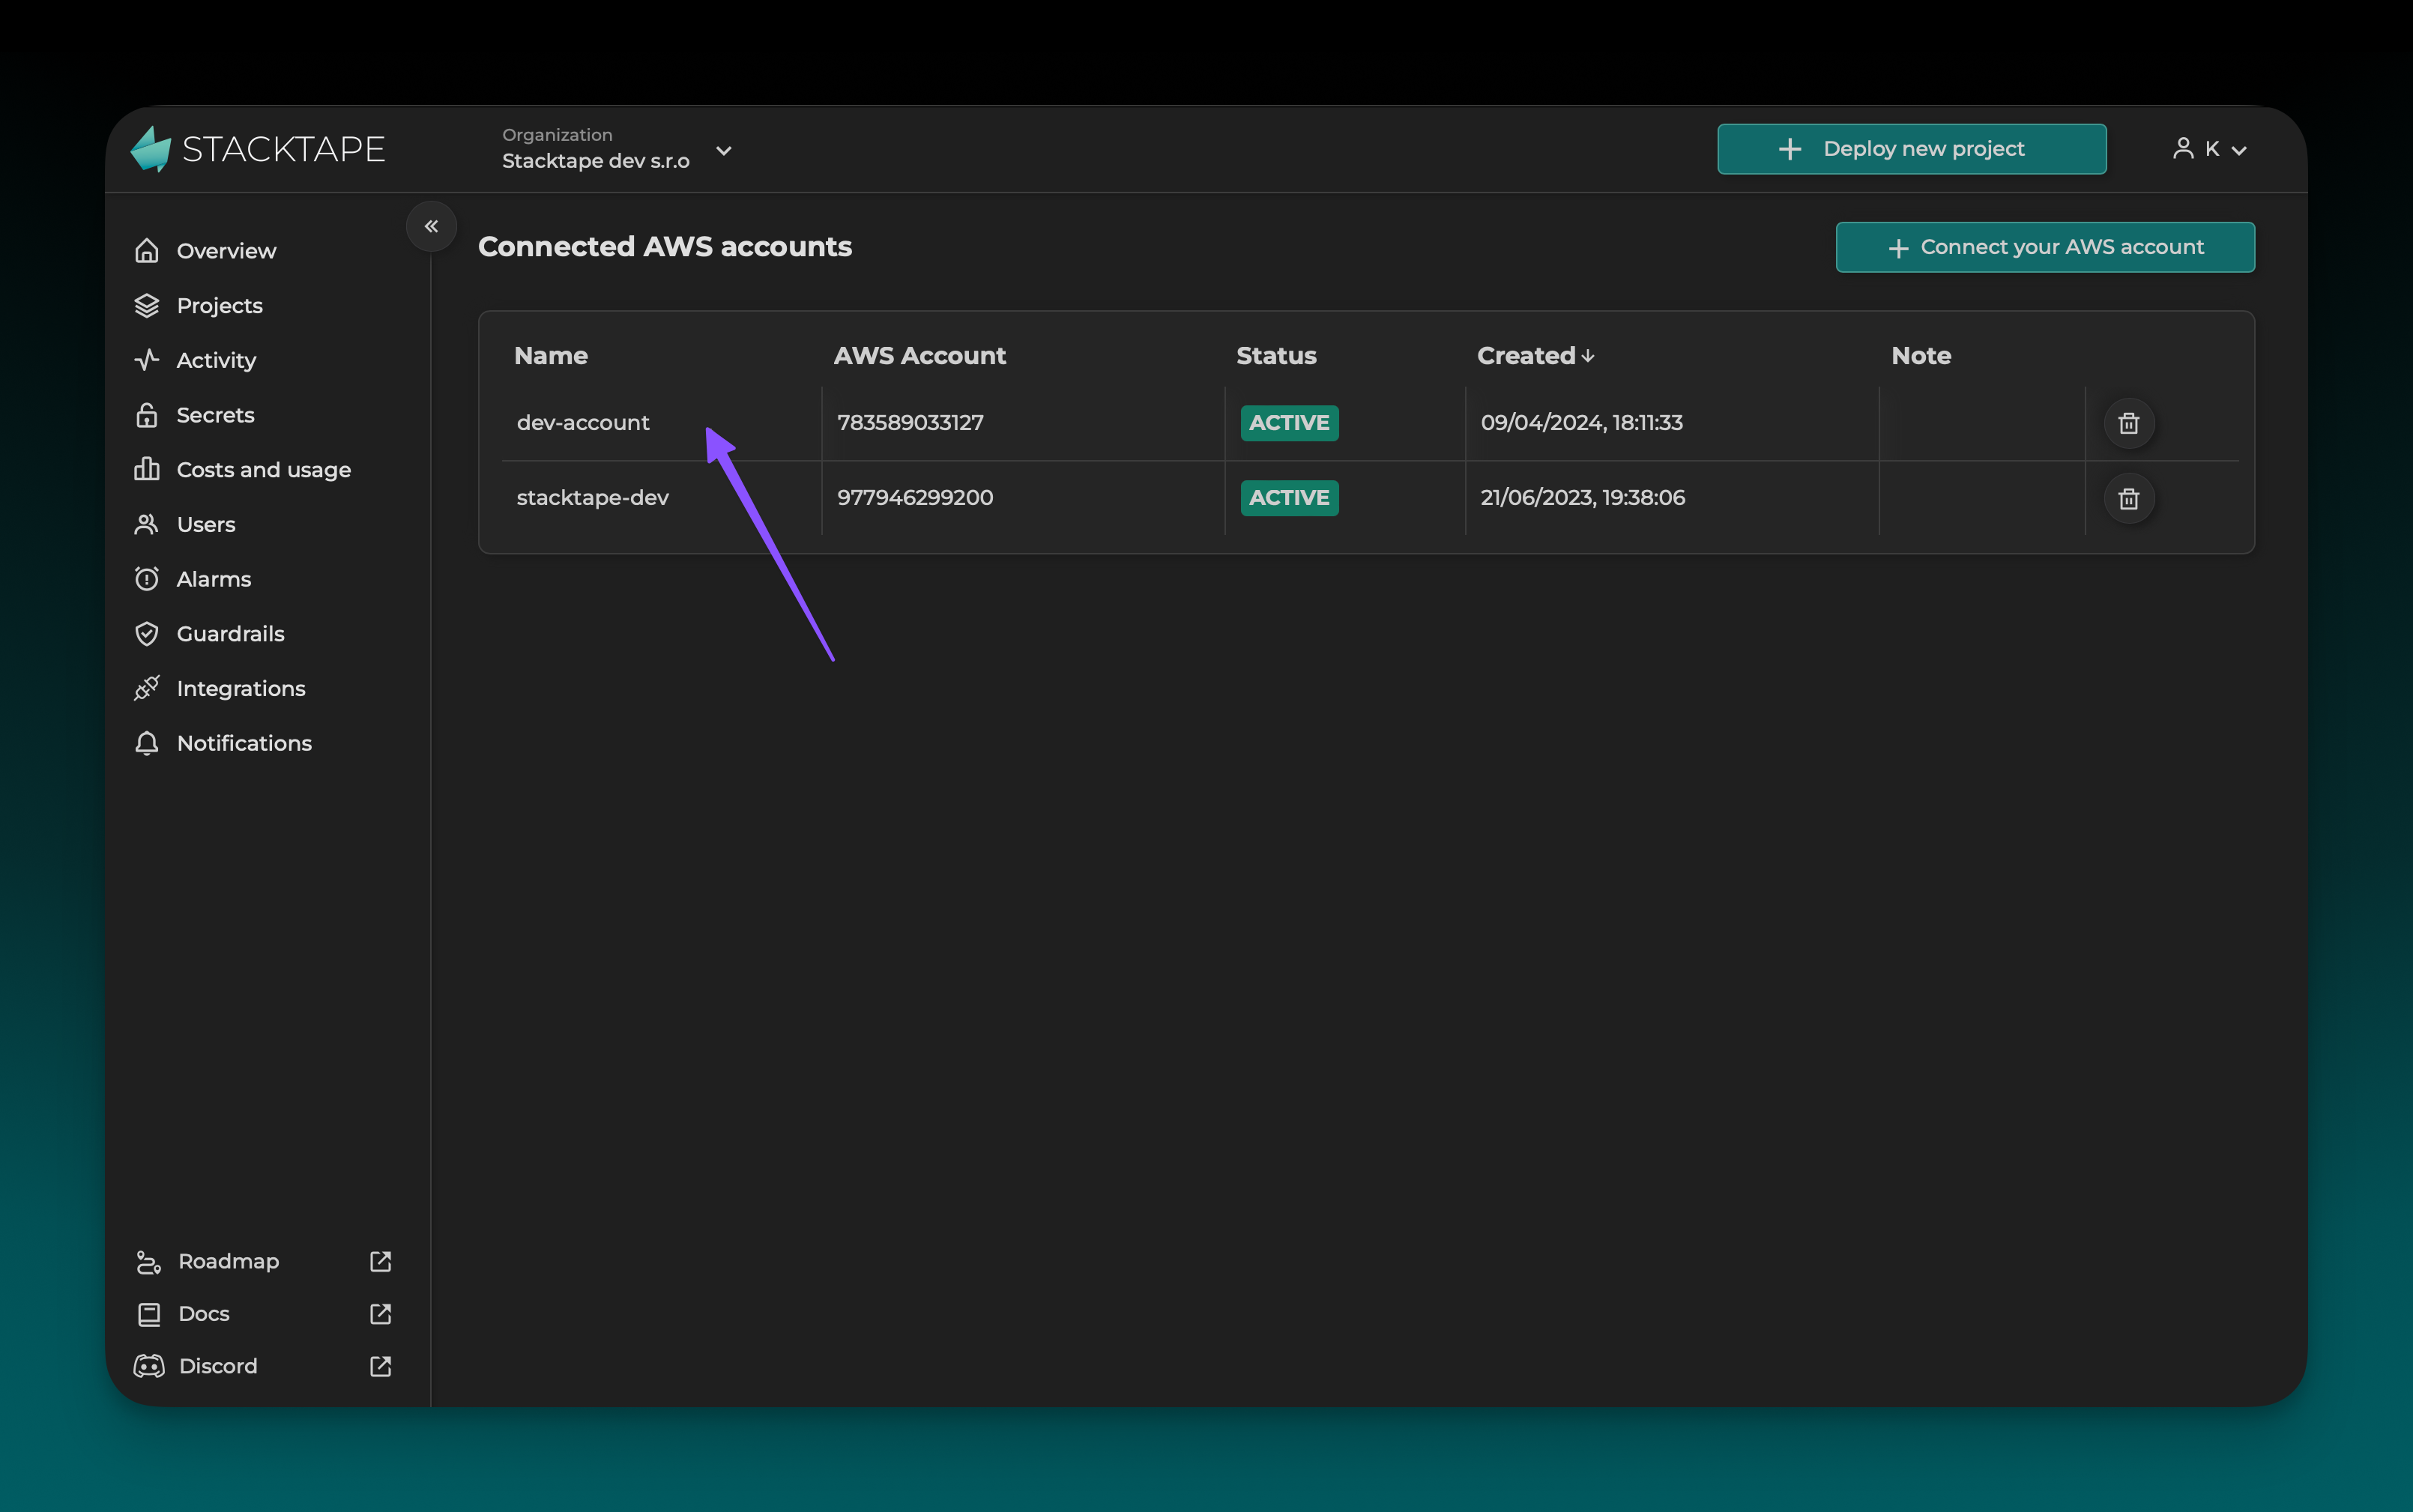
Once the connection stack is created, your AWS account will be connected to Stacktape. You should see the connected AWS account marked as ACTIVE on the AWS accounts page in the Stacktape Console.