Deploy Web API
1 - Select Preset
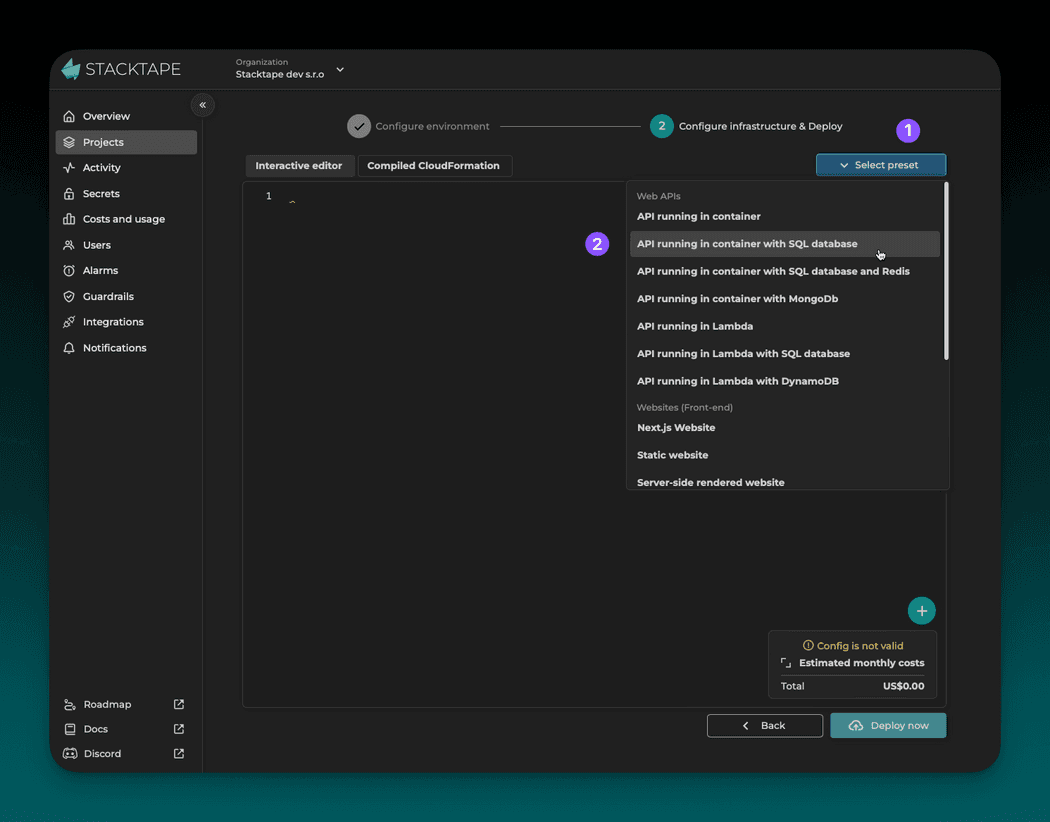
To start writing faster, select one of the template presets.
This tutorial uses API running in container with SQL database preset.
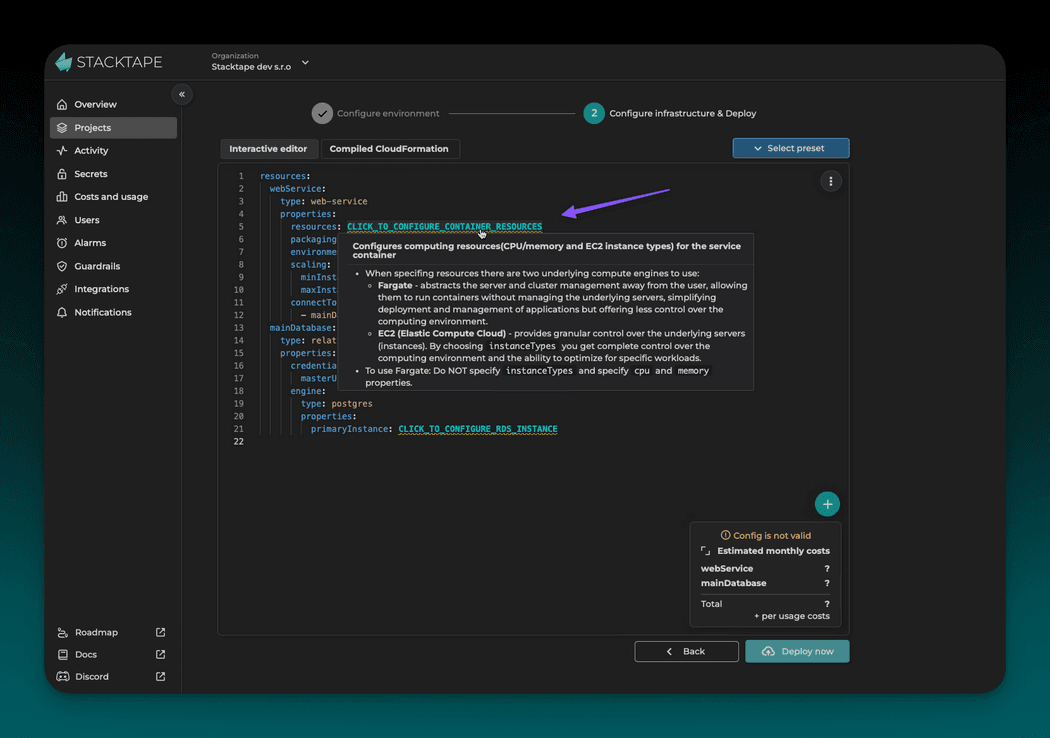
When hovering over sections of the template, you can see the docs relevant to the sections.
Also, notice that there is a cost estimator in the bottom right corner of the config editor. Estimated costs will appear once you configure sections that influence the price
2 - Configure Container
After selecting the preset, we need to configure a few sections.
Continue by configuring container resources (by clicking CLICK_TO_CONFIGURE_CONTAINER_RESOURCES).
In this tutorial, we use 1 vCPU and 1024 MB memory.
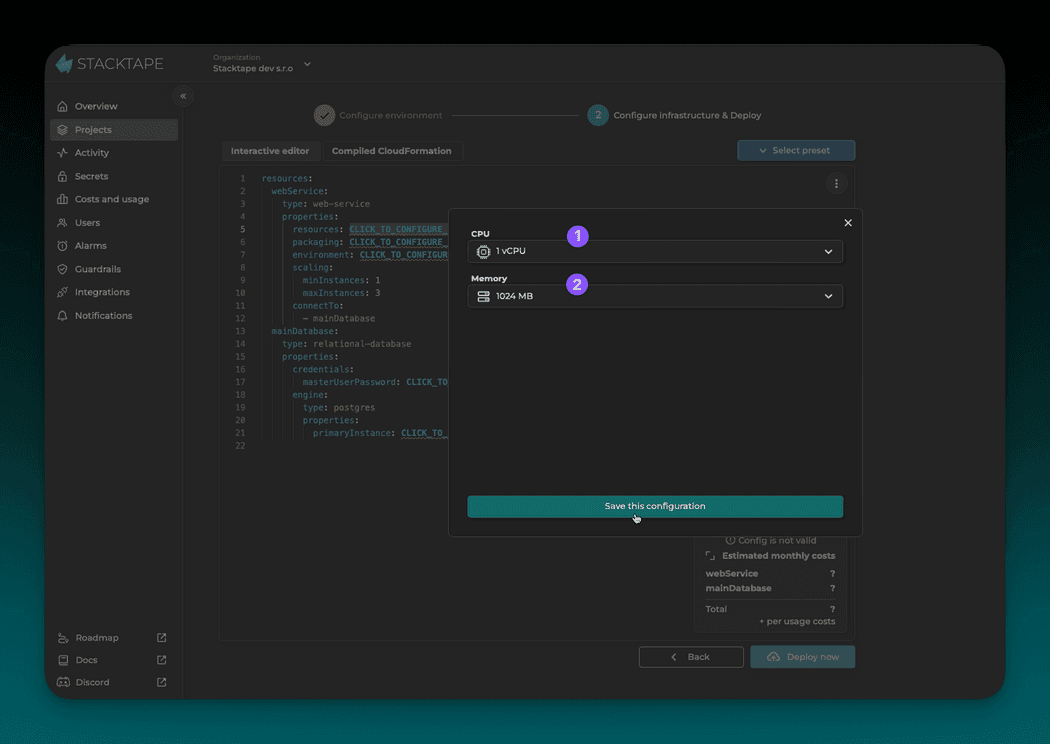
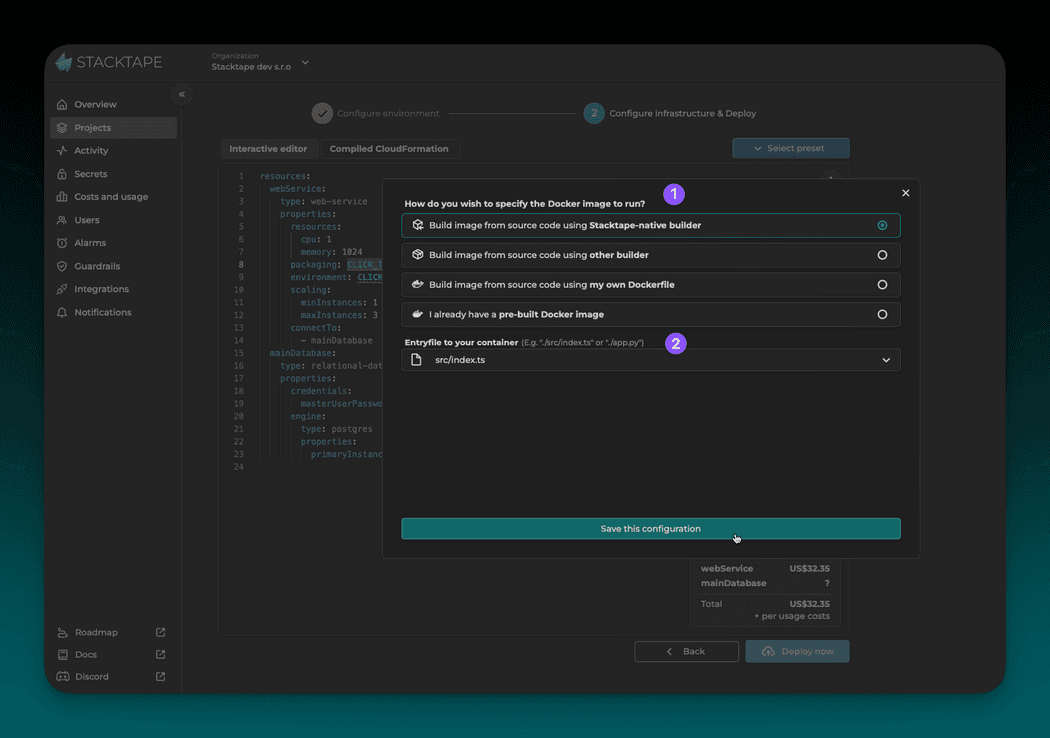
Next, configure container packaging (by clicking CLICK_TO_CONFIGURE_CONTAINER_PACKAGING).
Packaging section is used to specify the container image. Select the option that suits your needs.
In this tutorial, we use Stacktape native builder. With this packaging type, we only need to specify an entry point of
the application, and Stacktape will build the image from the source code during deployment.
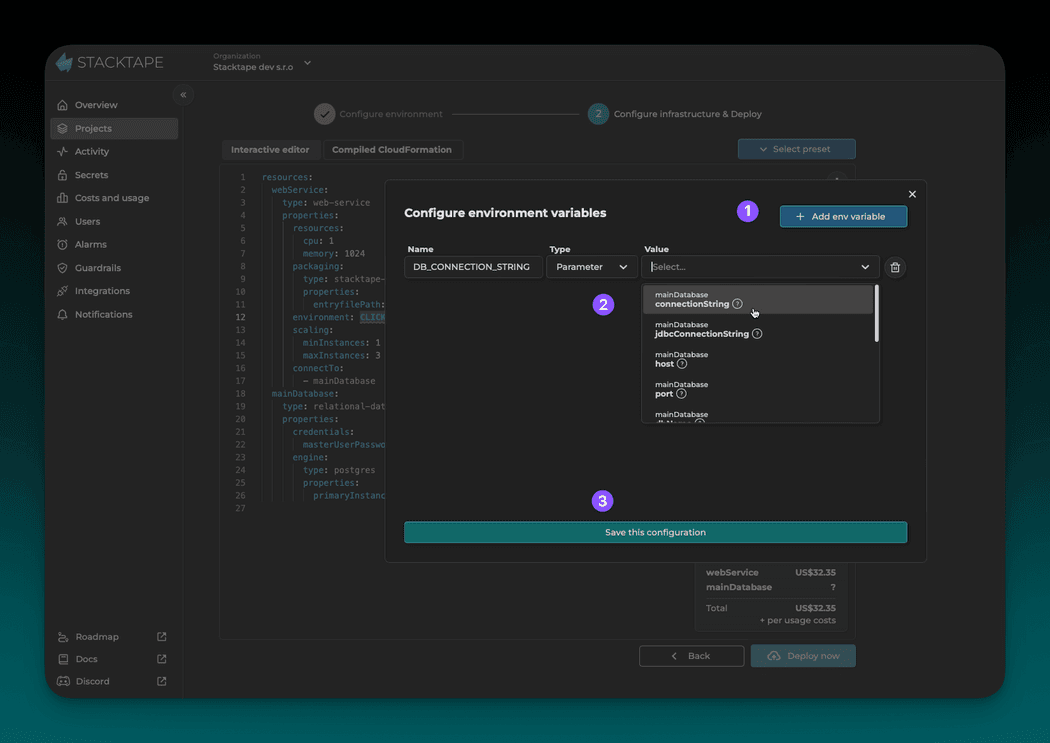
Next, configure container environment variables (by clicking CLICK_TO_CONFIGURE_ENVIRONMENT).
We add an environment variable DB_CONNECTION_STRING - the value is a parameter referenced from the SQL database
mainDatabase specified in the template. This parameter will be resolved during deployment.
Since the webService references database mainDatabase in connectTo list, parameters of the database are
automatically injected into the container.
For demonstration, we have assigned the database connection string to DB_CONNECTION_STRING variable. However, the
connection string is also injected as STP_MAIN_DATABASE_CONNECTION_STRING variable.
3 - Configure Database
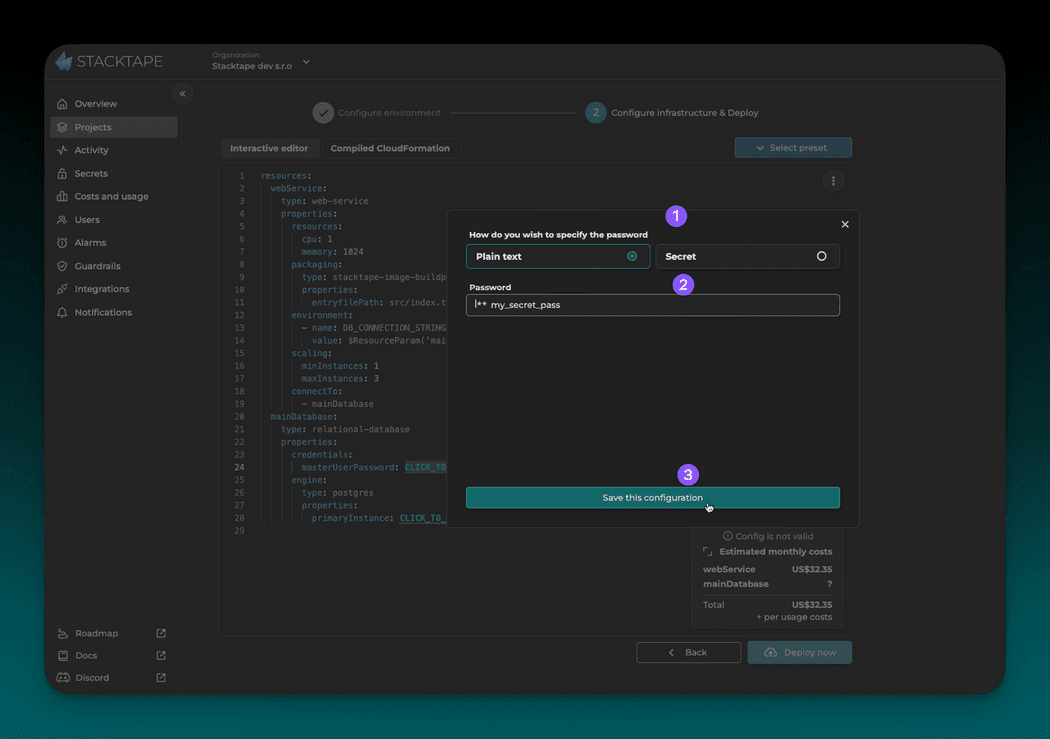
First, we configure the database password.
We recommend creating a secret and referencing it in the template for enhanced security of sensitive information. You can create and manage secrets in the Stacktape console.
To simplify this tutorial, we use a plain string to specify the password.
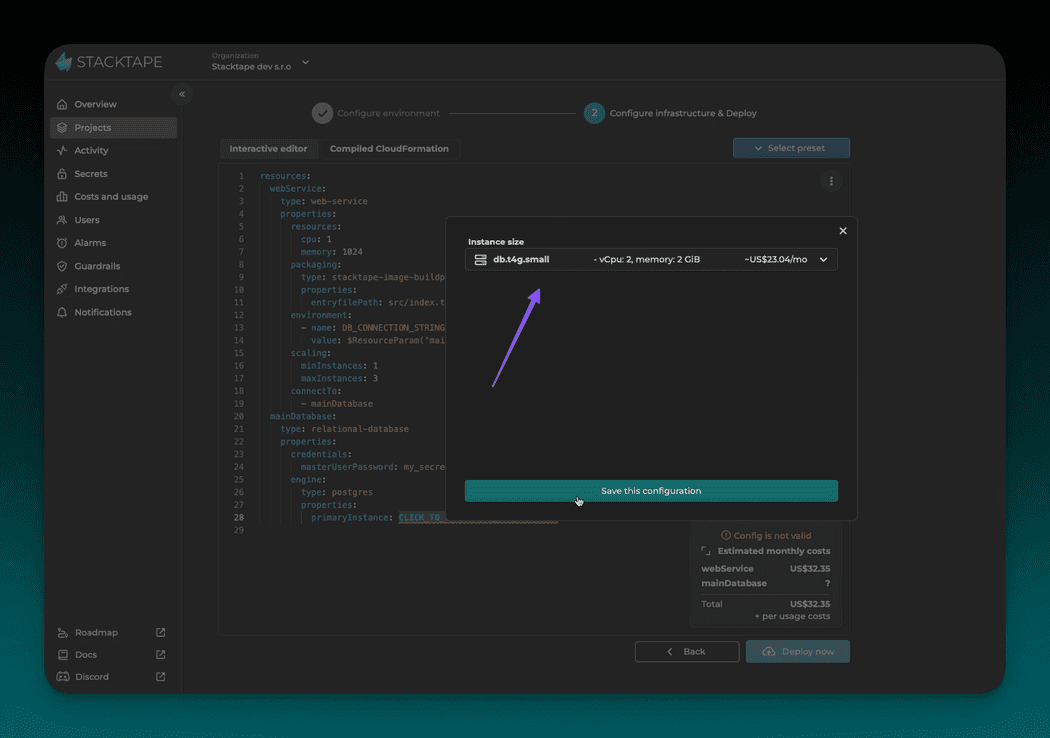
Next, configure the database's compute resources by specifying the size of the primary instance.
We use the db.t4g.small instance.
4 - Configure Migration Script
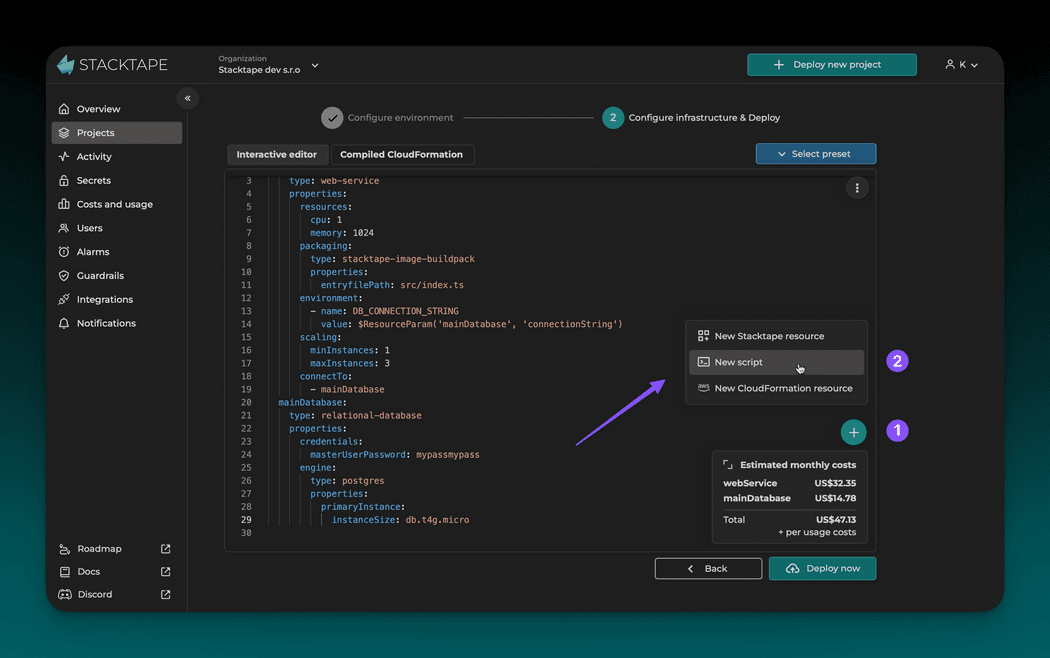
In this step, we add a script to our config. Scripts are used to specify actions (custom script or command) to be executed during the deployment lifecycle.
Scripts can be used for anything but are most commonly used for:
- triggering application build before deployment
- seeding database data after deployment
- triggering database migration after deployment
In this tutorial, we create a script that performs the database migration command after each deployment.
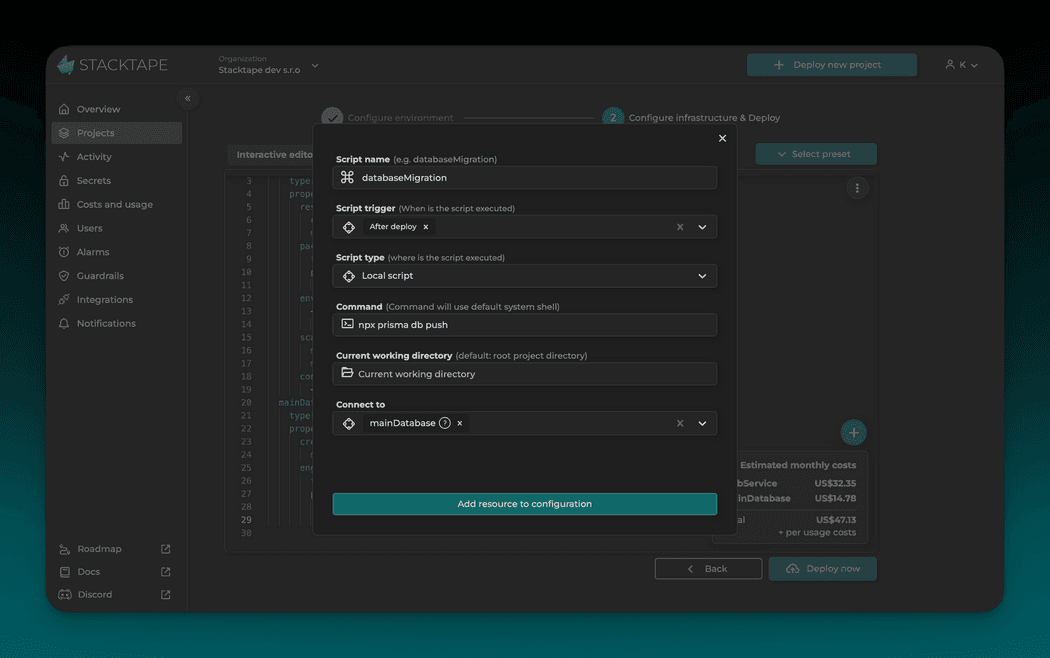
Configuring script:
- Script name - an arbitrary name for the script. We use
databaseMigration, - Script trigger - a hook that will determine when the script is executed (we use
After deploy), - Script type - we use
Local script. To see other types of scripts, refer to our docs, - Command - the command to be executed. We use
npx prisma db pushas our application uses Prisma d, - Current working directory - working directory for the script execution relative to the project root. By default, a project's root directory is the working directory,
- Connect to - we use
connect toto automatically inject environment variables (such as database connection string) into our script.
